Making a peach galette means wrestling with sticky, slightly squishy dough that refuses to roll out perfectly. You’ll get your hands covered in flour and fruit juice, and that’s part of the process.
Filling the pastry with ripe peaches, their juices bubbling and caramelizing as it bakes, is a messy, fragrant affair. You’ll need to keep an eye on the oven for that perfect, slightly charred edge.
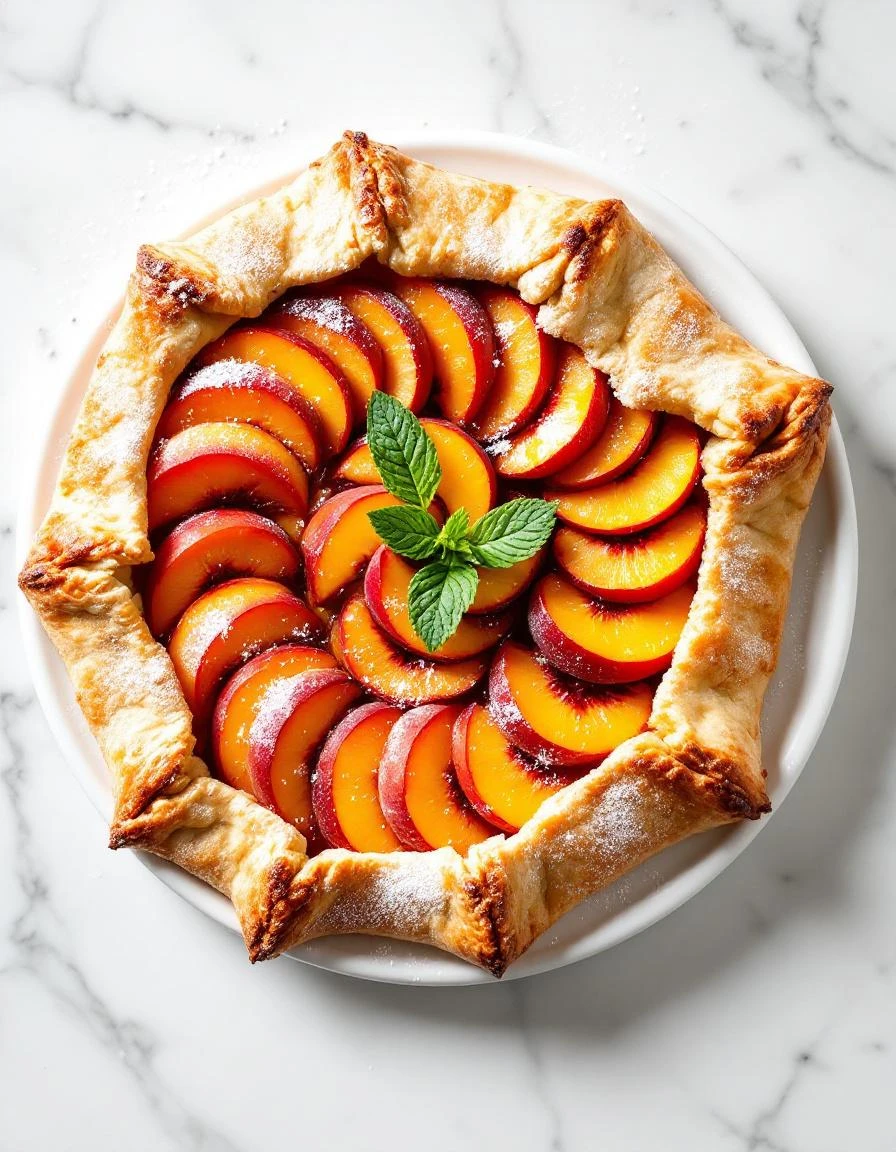
The satisfying crunch of flaky pastry giving way to the juicy, oozing peach layers.
What goes into this dish
- Peaches: Ripe, fragrant peaches are key—they should smell sweet and juicy. If your peaches are firm or tart, sprinkle with a little sugar and let them sit to soften up before slicing.
- Flour: All-purpose flour works fine; it makes a tender, flaky crust. If you want a nuttier flavor, swap in some almond flour, but keep the proportions balanced to avoid a crumbly crust.
- Butter: Cold, unsalted butter is best—cut into small pieces and cold from the fridge. For a richer crust, use a touch of lard or shortening, which makes it extra flaky and more forgiving when shaping.
- Sugar: Granulated sugar adds just enough sweetness, but if you prefer a deeper caramel note, use brown sugar—watch for a darker, richer flavor and color.
- Cream or Milk: Just a splash for brushing the crust—makes it glossy and golden. Skipping this saves calories, but expect a slightly duller finish and less crunch.
- Lemon Juice: Brightens the fruit’s sweetness and keeps the peaches from browning—use fresh lemon juice for that zing and aroma, or skip if you want a softer, less tart filling.
- Optional: Almond Extract or Vanilla: A few drops add warmth and depth—skip if you prefer pure fruit flavor, but it’s a quick way to boost aroma and richness.
Peach Galette
Ingredients
Equipment
Method
- In a large mixing bowl, combine the flour, sugar, and salt. Add cold, small pieces of butter and use a pastry cutter or your fingers to work the butter into the flour until the mixture resembles coarse crumbs with some pea-sized pieces.
- Gradually add ice-cold water, a tablespoon at a time, mixing gently until the dough just comes together when pressed. Shape it into a flat disk, wrap in plastic, and refrigerate for at least 30 minutes to relax the gluten and chill the butter.
- While the dough chills, slice the peaches and place them in a bowl. Add lemon juice, vanilla, and a tablespoon of sugar, tossing gently to coat. Let sit for 15-20 minutes to draw out juices and soften the fruit.
- Preheat your oven to 400°F (200°C). Line a baking sheet with parchment paper. Remove the dough from the fridge and let it sit for a few minutes. On a lightly floured surface, roll the dough into a roughly 12-inch circle, about 1/8 inch thick.
- Transfer the rolled dough to the prepared baking sheet. Spoon the peach filling into the center, leaving about 2 inches around the edges. Fold the edges over the filling, pleating as needed, to create a rustic border.
- Brush the exposed crust with beaten egg mixed with a splash of cream or milk. This will give the crust a shiny, golden finish. Optionally, sprinkle a little sugar over the crust for extra sweetness and crunch.
- Bake the galette in the preheated oven for 40-45 minutes, or until the crust is golden brown and crisp, and the fruit juices are bubbling and caramelized around the edges. Keep an eye on it to prevent over-browning.
- Remove the galette from the oven and let it cool slightly on a wire rack. The crust should be flaky and tender, with juicy, caramelized fruit inside. Serve warm or at room temperature, ideally with a scoop of vanilla ice cream or a dollop of whipped cream.
Common mistakes and how to fix them
- FORGOT to chill the butter: Use cold butter to keep the crust flaky and tender.
- DUMPED the peaches too early: Let sliced peaches sit with sugar to draw out juices.
- OVER-TORCHED the crust: Keep an eye on the oven to prevent burning the edges.
- MISSED the dough’s consistency: It should be crumbly but hold together when pressed.
Make-Ahead and Storage Tips
- Prep the crust and chill it in the fridge for at least an hour; it firms up and handles better when rolled.
- Slice and macerate peaches with a sprinkle of sugar a few hours ahead—juices will develop, making filling more flavorful.
- Assemble the galette up to the baking stage, then freeze it wrapped tightly—up to 2 weeks without loss of flavor.
- Refrigerate baked galette for up to a day—warm gently in the oven before serving for best texture and aroma.
- Filling may become a bit more concentrated in flavor overnight, so taste and adjust sugar or lemon if needed before baking.
FAQs
1. What does a peach galette smell like?
Peach galette smells like warm fruit and buttery pastry, with a hint of caramelized edges and toasted crust. The first bite offers a juicy, tender peach inside a flaky crust that crackles slightly when you cut through it.
2. How does a peach galette smell when baking?
The peaches release a sweet, fragrant aroma that fills the kitchen as they bake. The crust emits a toasty, buttery scent, with a subtle lemony tang from the juice. The caramelized sugar adds a smoky sweetness.
3. What textures should I expect?
The crust is flaky and buttery, with a slight crispness on the edges. Juicy peach slices ooze and shimmer, their juices bubbling softly. The sugar caramelizes, creating a tender, slightly chewy bite inside the flaky shell.
4. When is it best to eat the galette?
Peach galette is best enjoyed warm, with juices still slightly runny and the crust crisp but tender. The peaches should be soft and fragrant, with a gentle sweetness and a hint of lemon brightness. Reheat until the crust regains its crunch.
5. Can I use other fruits?
Yes, you can swap peaches for nectarines or plums. Just be sure they are ripe and juicy—firm fruit will be less flavorful. The baking time may need slight adjustment depending on the water content of your fruit.

Hi, I’m Katie Dawson, the owner, cook, and storyteller behind Little More Lovely. I run a small café in a cozy corner of Seattle, where the smell of freshly baked bread meets the hum of neighborhood chatter. I’ve spent years learning how food can bring people together, both as a professional and as someone who loves to share meals with family and friends.

