There’s something about bright green peas that feels like a little burst of spring, even in the dead of winter. When I first made this creamy pea pasta, I was after that fresh, almost sweet pop of flavor that lifts the soul and awakens the palate. It’s surprisingly simple but has this way of making you feel like you’ve captured a fleeting moment of sunshine.
I love how the peas turn velvety and vibrant once blended into the sauce, their sweetness balancing out the richness of the cream and cheese. It’s a dish that feels like a gentle reminder that even in the quietest seasons, there’s beauty in the small, fresh bits of life — in this case, tender peas and silky pasta coming together in a cozy bowl.
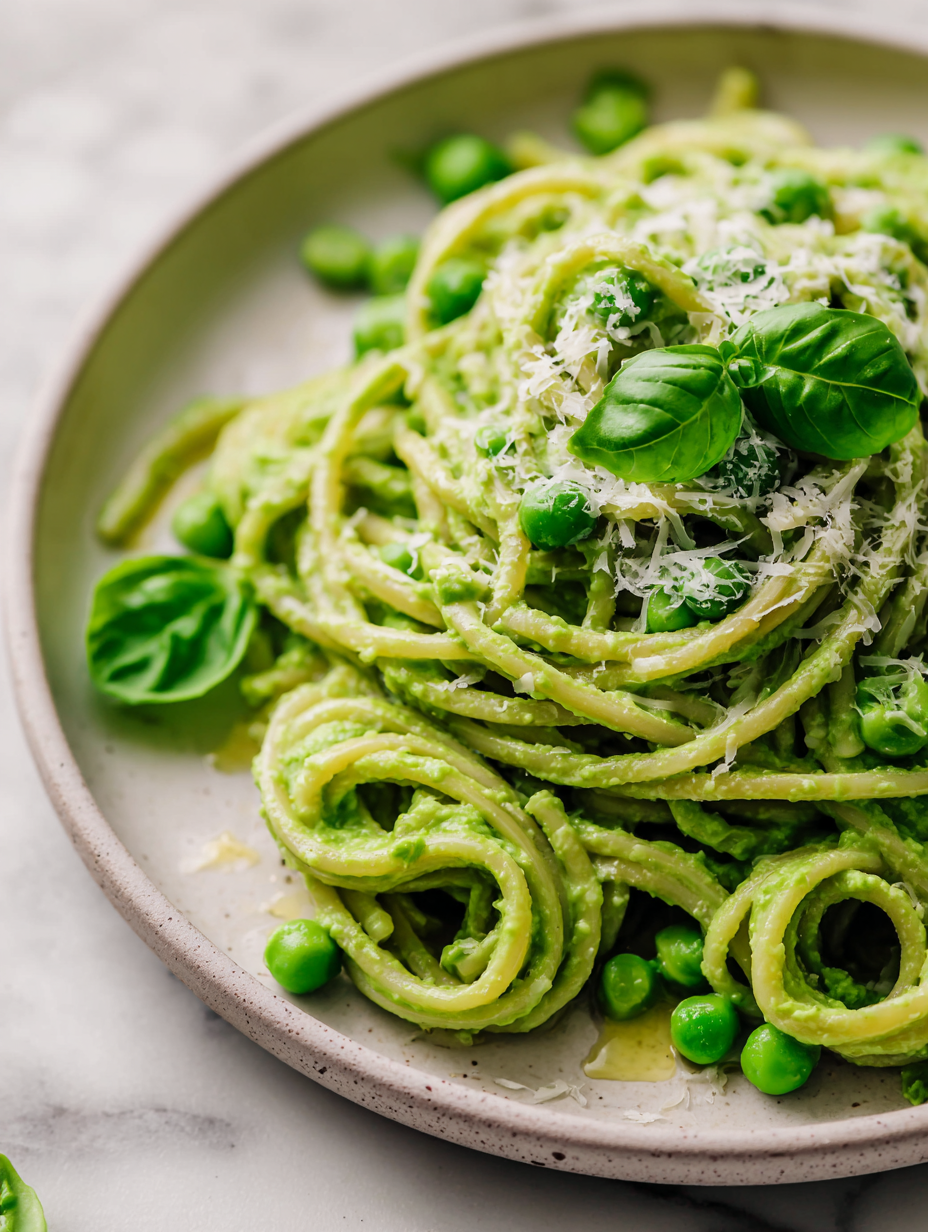
Using fresh, bright green peas in a creamy pasta to evoke the feeling of spring’s fleeting, fresh optimism, even in the depths of winter.
The story behind this recipe
- This recipe started from a simple craving for something green and comforting, but with a twist. I was tired of the usual pesto or just plain peas, so I decided to blend them into a sauce that’s smooth and bright, almost like a whisper of spring. It’s funny how a handful of fresh peas can lead to this creamy, satisfying dish that feels like a little secret between me and the seasons.
- I remember the first time I made it, I was standing in my tiny kitchen, peas still warm from the pod. The smell of garlic sizzling and the vibrant green puree swirling into the pasta made me feel like I’d captured a fleeting moment of freshness. Now, it’s become my go-to when I need a quick, honest meal that feels special without fuss.
- heading: The story behind this recipe
Ingredient breakdown: key components
- Frozen peas: I love the burst of sweetness and bright color they bring. Make sure they’re well thawed for a smoother sauce, or give them a quick blitz in the microwave before blending.
- Heavy cream: It adds that velvety richness I crave, but if you want a lighter version, try half-and-half or coconut cream. The flavor shifts a bit, but it still coats the pasta beautifully.
- Parmesan cheese: I always use freshly grated for that sharp, nutty punch. Skip pre-grated stuff; it melts better and gives you that authentic, cheesy glow.
- Garlic: I prefer it minced fine and sautéed until fragrant, just until it’s golden and smells like a cozy kitchen. Over-tossed garlic can turn bitter, so keep an eye on it.
- Pasta: I reach for a shape like fusilli or cavatappi—something with nooks to cradle the sauce. Don’t forget to salt the water generously; it’s where the flavor starts.
- Lemon zest (optional): Adds a zing that cuts through the cream—use a microplane for a fine, fragrant dust. It brightens up the dish without overshadowing the peas’ sweetness.
- Salt & pepper: I season in layers—taste after blending, then adjust with flaky sea salt and freshly cracked pepper. Salting the pasta water well helps, but final seasoning makes all the difference.
Spotlight on key ingredients
Frozen peas:
- I love their burst of sweetness and vibrant color. Thaw well or give them a quick zap before blending.
- They turn velvety and bright once pureed, balancing richness with that fresh, sweet pop.
Parmesan cheese:
- I always favor freshly grated for that sharp, nutty flavor. It melts better and gives a cheesy glow.
- It’s the secret to that silky, cheesy sauce that clings to every noodle.
Notes for ingredient swaps
- Dairy-Free: Swap heavy cream for coconut cream or cashew cream; adds richness but a different flavor note.
- Vegan: Use nutritional yeast or vegan Parmesan; it won’t melt as well but adds cheesy umami.
- Gluten-Free: Replace traditional pasta with rice or chickpea pasta; the texture may be slightly different but equally satisfying.
- Butter: Substitute with olive oil or avocado oil for a lighter, more neutral fat that still enriches the sauce.
- Lemon Zest: Omit or replace with a splash of vinegar for acidity; keeps the bright lift without citrus’s freshness.
- Cheese: Use Pecorino or Gruyère if you want a different cheesy profile; each adds a unique depth.
- Fresh Peas: If fresh aren’t available, frozen peas work perfectly—just thaw and drain well before blending.
Equipment & Tools
- Large pot: To boil the pasta evenly
- Blender: To purée peas into a smooth sauce
- Sauté pan: To warm the sauce and combine flavors
- Wooden spoon: For gentle stirring without scratching pans
Step-by-step guide to creamy pea pasta
- Gather all equipment: a large pot for pasta, a blender, a sauté pan, and a wooden spoon for stirring. Fill the pot with water, salt generously, and bring to a rolling boil at 100°C (212°F).
- Add your pasta—fusilli or cavatappi work well. Cook until just al dente, about 8-10 minutes. Drain, reserving a cup of pasta water, and set aside.
- While pasta cooks, prepare the pea sauce. In the blender, combine 1 cup of thawed frozen peas, 1/2 cup heavy cream, 1/4 cup grated Parmesan, and 1 clove garlic minced. Blend until smooth and bright green. If too thick, add a splash of reserved pasta water.
- In the sauté pan, heat 1 tablespoon olive oil over medium heat. Add the remaining garlic (finely minced) and cook just until fragrant, about 30 seconds. Don’t let it brown or it’ll turn bitter.
- Pour the pea mixture into the pan, stirring constantly. Warm it through on low heat; it should become silky and vibrant. Check the aroma—garlic should be fragrant, not burnt.
- Add the drained pasta to the sauce, tossing gently to coat. If the sauce is too thick, add a little more reserved pasta water until creamy and coats the pasta evenly.
- Taste and season with flaky sea salt, freshly cracked pepper, and a touch of lemon zest if desired. Toss again to distribute flavors evenly.
- Plate immediately, garnishing with extra Parmesan and a sprinkle of fresh herbs if you like. Serve hot with a drizzle of olive oil for shine.
Serve immediately while hot. Garnish with extra cheese and herbs for a fresh touch. If needed, keep warm covered, but best enjoyed right away for creaminess and vibrancy.
How to Know It’s Done
- Pasta should be al dente, with a slight bite.
- Sauce should be velvety, bright green, and fragrant.
- Pasta is evenly coated, with no clumps or dryness.
Creamy Green Pea Pasta
Ingredients
Equipment
Method
- Bring a large pot of salted water to a rolling boil. Add the pasta and cook until just al dente, about 8-10 minutes. Drain and set aside, reserving a cup of pasta water.
- In the meantime, place the thawed peas, heavy cream, grated Parmesan, and minced garlic into a blender. Blend until smooth and vibrant green, thick but pourable. If it’s too thick, add a splash of the reserved pasta water to loosen.
- Heat the olive oil in a sauté pan over medium heat. Add the minced garlic and cook gently, stirring, until fragrant and just beginning to turn golden—about 30 seconds. Be careful not to let it brown.
- Pour the pea mixture into the pan, stirring constantly. Warm it through over low heat until it is silky and bright green, about 2-3 minutes. Taste and season with salt, pepper, and lemon zest if using.
- Add the drained pasta to the pan with the sauce. Toss gently with a wooden spoon until the noodles are evenly coated and glossy. If the sauce is too thick, add a bit more reserved pasta water to loosen it up.
- Serve immediately, garnished with extra Parmesan and a sprinkle of fresh herbs if desired. Enjoy the vibrant, velvety pasta while hot and fresh.
Pro tips for creamy pea pasta
- Bolded mini-head: Use fresh or thawed peas for a brighter, more vibrant color and flavor.
- Bolded mini-head: Warm the peas before blending to help release their sweet, grassy aroma.
- Bolded mini-head: Sauté garlic gently until fragrant—avoid browning—to prevent bitterness in your sauce.
- Bolded mini-head: Reserve pasta water and add gradually to achieve a silky, cohesive sauce.
- Bolded mini-head: Grate Parmesan finely to melt smoothly and enhance the creamy texture.
- Bolded mini-head: Taste and adjust seasoning in layers—salt, pepper, and lemon zest—for balanced flavor.
- Bolded mini-head: Serve immediately to enjoy the sauce’s velvety texture and fresh brightness at its peak.
Common mistakes and how to fix them
- FORGOT to adjust heat: If sauce thickens too much, add warm pasta water and stir gently.
- DUMPED in all peas at once: Add peas gradually for optimal blending and bright color.
- OVER-TORCHED garlic: Cook garlic on low, just until fragrant, to prevent bitterness.
- MISSED seasoning layers: Taste often and adjust salt and pepper in stages for depth.
Quick fixes and pantry swaps
- When sauce looks dull, splash in a bit more pasta water for shimmer and consistency.
- If sauce separates, turn down heat and whisk vigorously until smooth again.
- Splash some lemon juice if peas turn insipid or dull in flavor.
- Patch over-salted sauce by stirring in a dollop of cream or a small pat of butter.
- Shield burnt garlic by removing the pan from heat immediately and adding more peas to dilute.
Prep, store, and reheat tips
- Prep the sauce ingredients: blend peas and cream ahead, then refrigerate for up to 2 days; the vibrant green dims slightly but still fresh.
- Cook the pasta in advance, drain, toss lightly with oil to prevent sticking, and store in an airtight container for up to 24 hours—reheat with a splash of water or broth.
- Reheat gently in a pan over low heat, stirring frequently until warmed through; the sauce may thicken—add a little hot water to loosen it up and restore creaminess.
- The flavors mellow slightly after sitting, but the bright pea sweetness and cheesy richness still shine through if reheated carefully.
Top questions about creamy pea pasta
1. Can I use fresh peas instead of frozen?
Yes, using fresh peas works beautifully, just blanch or steam them briefly before blending. Frozen peas are a great shortcut and retain vibrant color and sweetness.
2. Can I substitute fresh peas for frozen?
Absolutely. Just thaw frozen peas or quickly blanch fresh peas to soften them before blending into the sauce.
3. Does fresh peas change the recipe?
Yes, but you may need to adjust the cooking time slightly, especially if using fresh peas that aren’t pre-cooked. The key is to ensure they’re tender before blending.
4. How do I prevent the sauce from being grainy?
To keep the sauce bright and smooth, blend the peas with a splash of cream and season to taste after cooking.
5. Should I add lemon to the sauce?
Adding a splash of lemon zest or juice just before serving brightens the dish and cuts through the richness of the cream.
6. What if the sauce is too thick?
If the sauce becomes too thick, stir in a little reserved pasta water to loosen it and restore creaminess.
7. Can I make this vegan?
Yes, you can substitute coconut cream or cashew cream for dairy if you want a vegan version. The flavor will shift slightly, but it remains rich and velvety.
8. How can I keep it dairy-free?
For a dairy-free option, use olive oil instead of butter, and choose a vegan cheese or skip cheese altogether—though it will be less cheesy, still delicious.
9. Can I omit the cheese?
Using a good quality Parmesan makes a big difference. It melts better and adds a sharp, nutty flavor that elevates the sauce.
10. Can I make the sauce ahead?
Yes, you can prepare the sauce ahead by blending the peas and cream in advance. Keep it chilled and reheat gently, adding a splash of water if needed.
This creamy pea pasta isn’t just a quick meal; it’s a little reminder that bright flavors can come from simple, honest ingredients. Every time I make it, I’m reminded of spring’s fleeting green and the joy of turning everyday ingredients into something comforting and fresh.
It’s perfect for those nights when I want something satisfying but not heavy, with a touch of brightness that lifts the soul. No matter the season, this dish keeps me connected to that feeling of lightness and renewal, even in the busiest moments.

Hi, I’m Katie Dawson, the owner, cook, and storyteller behind Little More Lovely. I run a small café in a cozy corner of Seattle, where the smell of freshly baked bread meets the hum of neighborhood chatter. I’ve spent years learning how food can bring people together, both as a professional and as someone who loves to share meals with family and friends.

