Strawberry Earthquake Cake is a wild ride in the kitchen, a messy, beautiful homage to the chaos of nature. The way those ripe strawberries burst and ooze, almost like trembling earth, makes every slice a little adventure. It’s not polished or perfect, but that’s what makes it real and memorable.
I love how this cake captures the raw, vibrant energy of a landscape after a storm — the cracked earth, the scattered berries, the dark chocolate veins running through. Baking it feels like a small act of wildness, a way to embrace the unpredictable beauty of fresh fruit and simple ingredients.
This cake is a reminder that sometimes, the best desserts come from throwing a little chaos into the mix. It’s imperfect, a little messy, but full of personality and flavor. That’s what makes it special, especially when you’re craving something that feels as lively as the season itself.
Focusing on how the vibrant, juicy strawberries mimic the natural earth tones of a landscape, this cake captures the chaos and beauty of an earthquake through layers of fruit, chocolate, and a crumbly topping that resembles cracked earth.
The story behind this recipe
This recipe was born out of a summer chaos in my kitchen. I had a bunch of ripe strawberries that needed using, and a craving for something that felt wild, a little messy, but deeply satisfying. One day, I threw together a cake that mimicked the cracked earth after a storm—full of juicy bursts and chocolate veins. It’s become a favorite because it’s imperfect, just like those raw natural moments we all experience.
Ingredient breakdown: key components
- Strawberries: Juicy, ripe berries bursting with bright, sweet-tart flavor. Use fresh, and if they’re a little soft, it’s perfect for that oozy effect.
- Cream Cheese: Adds richness and tang, making the cake gooey and luscious. Soften it well before mixing—no lumps, no fuss.
- Chocolate Chips: I love semi-sweet for depth, but dark or milk work too. Expect that melt-in-your-mouth, smoky-sweet hit in every bite.
- Cake Mix: The base that holds everything together. You can swap in a gluten-free mix if needed, but keep an eye on moisture levels.
- Sugar: Just the right amount to balance the berries’ brightness and the chocolate’s richness. Adjust based on your strawberries’ sweetness.
- Crumb Topping: A mix of butter, flour, and sugar that crumbles into a crackly, earth-like crust. Add a pinch of cinnamon if you’re feeling warm and cozy.
- Eggs: Bind everything and give structure. Use fresh eggs; no need for anything fancy here, just reliable and straightforward.
Spotlight on key ingredients
Strawberries:
- Juicy, bright, with a natural tartness that almost trembles on the tongue. Soft enough to ooze when baked, but firm enough to hold shape initially.
- Chocolate Chips: Melty, smoky-sweet bursts that spread through the batter, creating gooey pockets. Expect them to melt into a rich, velvety texture during baking.
Cream Cheese:
- Silky, tangy, and dense—it transforms from soft to slightly firm as it bakes, adding a luscious, sticky contrast to the fruit and cake layers. The aroma of tangy dairy mingles with sweet strawberries as it cooks.
- ingredient
Notes for ingredient swaps
- Dairy-Free: Swap regular cream cheese for a dairy-free cream cheese alternative. Expect a slightly different tang and creaminess but still rich.
- Gluten-Free: Use a gluten-free cake mix or almond flour in place of all-purpose flour. The texture may be a bit denser but still delicious.
- Sugar Alternatives: Replace granulated sugar with coconut sugar or honey. The flavor will be a touch more caramel-like but maintain sweetness.
- Chocolate Variations: Dark chocolate chips can replace semi-sweet for a deeper, more intense cocoa flavor. Milk chocolate adds sweetness and creaminess.
- Strawberry Sub: Raspberries or blueberries can be used for a different burst of tartness and color, though the visual impact might differ.
- Crumb Topping: Omit cinnamon or add a pinch of nutmeg or ginger for a warmer spice note that complements the berries.
- Butter: Substitute with coconut oil or vegan butter for a different richness and slightly different flavor profile.
Equipment & Tools
- 9-inch springform pan: Holds the cake, allows easy removal and presentation.
- Mixing bowls: Combine ingredients separately for batter and topping.
- Whisk or electric mixer: Blend eggs, vanilla, and wet ingredients smoothly.
- Spatula: Spread batter evenly and layer strawberries.
- Pastry cutter or fingers: Mix crumb topping until crumbly.
- Oven thermometer (optional): Ensure accurate baking temperature.
Step-by-step guide to Strawberry Earthquake Cake
- Preheat your oven to 175°C (350°F). Grease a 9-inch springform pan or similar deep baking dish. Set aside.
- In a medium bowl, combine 1 1/2 cups of all-purpose flour, 1 cup of sugar, 1 teaspoon of baking powder, and 1/2 teaspoon of salt. Mix well.
- In a separate small bowl, melt 1/2 cup of unsalted butter (about 45 seconds in the microwave). Let it cool slightly.
- In a large bowl, beat 3 large eggs with 1 teaspoon of vanilla extract until frothy, about 30 seconds.
- Pour in the melted butter and whisk until combined. Gradually add the dry ingredients, mixing just until smooth.
- Gently fold in 1 cup of semi-sweet chocolate chips, ensuring even distribution.
- Wash and hull 2 cups of fresh strawberries. Slice them thinly, about 1/4-inch thick. Set aside.
- Pour half of the batter into the prepared pan, spreading evenly.
- Layer half of the sliced strawberries over the batter, pressing them slightly into the mix.
- Add the remaining batter on top, smoothing with a spatula. Arrange the rest of the strawberries on top in a decorative pattern.
- Prepare the crumb topping: combine 1/2 cup of flour, 1/4 cup of sugar, 1/4 cup of cold unsalted butter (cubed), and a pinch of cinnamon if desired. Mix with fingers or a pastry cutter until crumbly.
- Sprinkle the crumb evenly over the top of the cake.
- Bake for 45-50 minutes, or until the top is golden and a toothpick inserted into the center comes out clean or with moist crumbs.
- During baking, the cake will crack and the strawberries will release juices, creating that earthquake-like appearance. Expect some bubbling around the edges.
- If the topping darkens too quickly, loosely tent with foil. If the strawberries start to burn, reduce oven temperature slightly or cover earlier.
- Remove from oven and let the cake rest in the pan for about 20 minutes. The filling will set as it cools slightly.
- Transfer to a wire rack and cool completely before slicing. This helps prevent the layers from sliding apart.
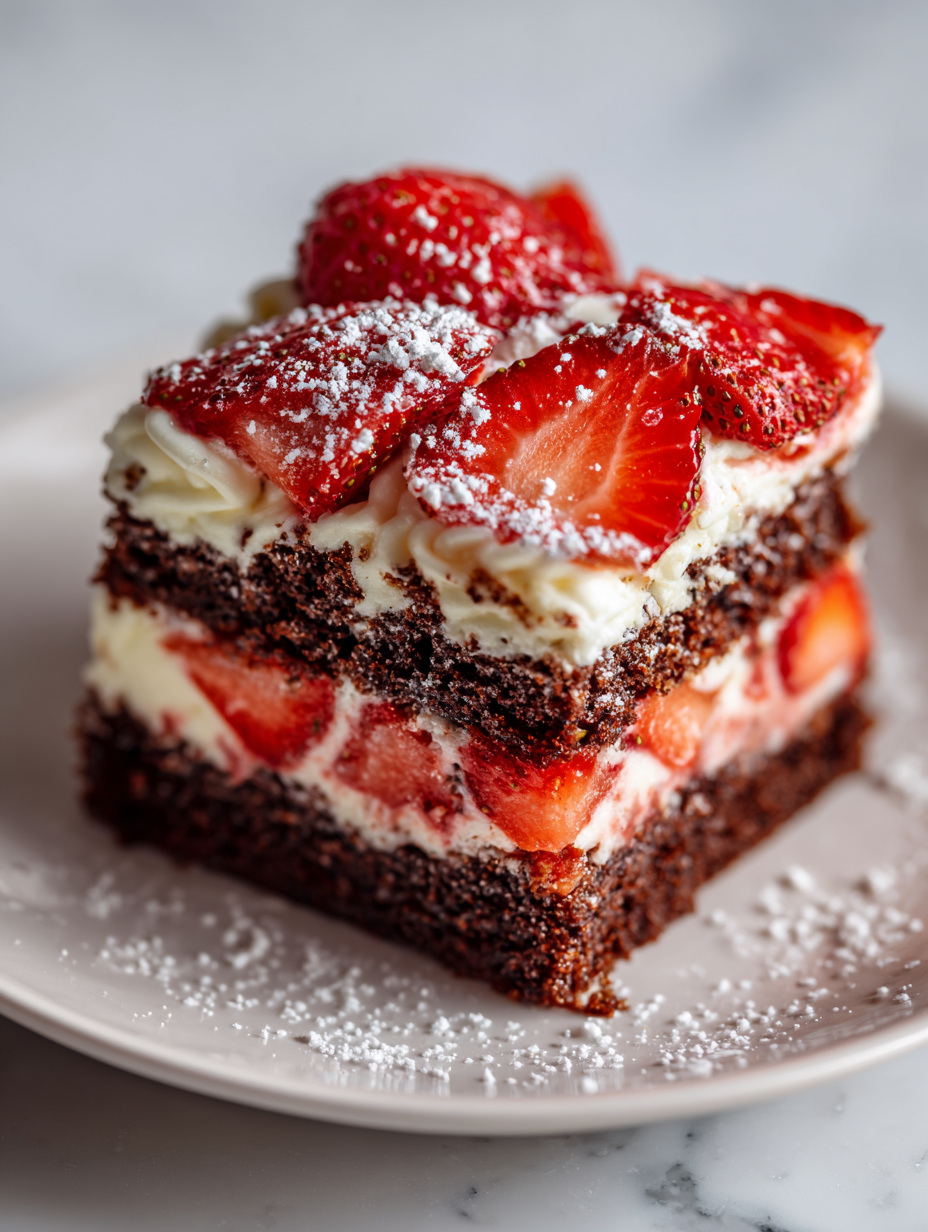
- Serve at room temperature or slightly warm, with a dusting of powdered sugar if desired. The texture should be gooey, with a crackly topping and oozing strawberries.
Let the cake cool in the pan 20 minutes, then remove the sides of the springform. Slice with a sharp knife, serving slightly warm or at room temperature. The flavors deepen as it cools, and the strawberries set into luscious pockets.
How to Know It’s Done
- Cake top is golden with cracks, and strawberries are bubbling around edges.
- Toothpick inserted in center comes out with moist crumbs, not raw batter.
- Crumb topping is crisp and crumbly, not soggy or burnt.
Strawberry Earthquake Cake
Ingredients
Equipment
Method
- Preheat your oven to 175°C (350°F) and lightly grease your springform pan to prevent sticking.
- In a mixing bowl, combine the flour, sugar, baking powder, and salt. Whisk until evenly mixed, creating a dry base for the batter.
- In a separate bowl, melt the butter and let it cool slightly. Then, whisk in the eggs and vanilla until the mixture is smooth and slightly frothy.
- Pour the wet mixture into the dry ingredients and gently fold together with a spatula until just combined, avoiding overmixing. The batter will be thick but smooth.
- Fold in the chocolate chips, distributing them evenly throughout the batter for melty pockets of richness.
- Pour half of the batter into the prepared springform pan, spreading it evenly across the bottom.
- Scatter a layer of sliced strawberries over the batter, pressing them gently into the batter to encourage juiciness and even distribution.
- Top with the remaining batter, smoothing it out with a spatula, then arrange the rest of the strawberries on top in a decorative pattern.
- Prepare the crumb topping by mixing the flour, sugar, and cinnamon in a small bowl. Add the cubed cold butter and use your fingers or a pastry cutter to work it into a crumbly mixture.
- Sprinkle the crumb topping evenly over the top of the assembled cake, creating a cracked-earth appearance.
- Bake for 45-50 minutes, or until the top is golden and cracked, and the strawberries are bubbling around the edges. The cake should emit a fragrant smell, and a toothpick inserted in the center should come out with moist crumbs.
- Remove the cake from the oven and let it rest in the pan for about 20 minutes to allow the filling to set. The bubbling and crackling will continue during this time.
- Carefully transfer the cake to a wire rack or serve directly from the springform pan. Slice into portions, revealing the oozing strawberries and rich, gooey layers. Enjoy the lively, crackled top and burst of fruit in every bite!
Pro tips for Strawberry Earthquake Cake
- Bolded Tip: Use very cold butter for the crumb topping to ensure it crumbles into a flaky, crackly crust.
- Bolded Tip: Lightly press strawberries into the batter rather than sinking them, for even distribution and juiciness.
- Bolded Tip: Bake on the middle rack and rotate halfway through to promote even cracking and bubbling.
- Bolded Tip: Tent with foil if the top darkens too quickly—prevent burnt edges while keeping the center moist.
- Bolded Tip: Check for doneness by gently shaking; the center should jiggle slightly but not be liquid.
- Bolded Tip: Let the cake cool for at least 20 minutes so the filling firms up, making slicing cleaner.
- Bolded Tip: For an extra burst of flavor, sprinkle a little sea salt or flaky salt on top just before serving.
Common mistakes and how to fix them
- FORGOT to check oven temperature → Use an oven thermometer for accuracy.
- DUMPED in all strawberries at once → Layer strawberries gently to prevent sinking.
- OVER-TORCHED topping → Cover with foil if it darkens too fast.
- MISSED resting time → Let the cake rest 20 minutes for proper setting.
Quick fixes and pantry swaps
- When strawberries release too much juice, splash a little flour on them to absorb excess moisture.
- If the topping crumbles too easily, patch with a quick brush of melted butter and a sprinkle of sugar.
- DUMPED in too many strawberries at once? Shield the edges with foil to prevent burning while interior bakes.
- When the center jiggles excessively, rescue with an extra 5 minutes in the oven and check again.
- Splash a touch of vanilla or lemon juice when in doubt for an instant flavor lift, even if missing from the recipe.
Prep, store, and reheat tips
- Prepare the crumb topping and refrigerate it a day ahead; it stays crisp and ready to sprinkle on top.
- Assemble the cake (excluding the baked topping) up to 24 hours in advance, then cover tightly and store in the fridge.
- Baked cake can be stored covered in the fridge for up to 3 days; bring to room temperature before serving for best texture.
- Reheat slices briefly in the microwave (about 20 seconds) until warm and gooey, watching for steam and bubbling around the edges.
- For longer storage, freeze slices wrapped tightly for up to 2 months; thaw overnight in the fridge and reheat gently, sensory cue: fragrant, warm, slightly gooey.
Top questions about Strawberry Earthquake Cake
1. How do I pick strawberries for this cake?
Look for strawberries that are deeply fragrant, soft but still hold shape when sliced. They should be bright red and juicy, almost trembling if ripe enough.
2. What’s the best way to prepare cream cheese?
Use softened cream cheese to avoid lumps. It should be silky and smooth, blending easily into the batter for that luscious, sticky texture.
3. How do I know when the cake is done?
Bake until the top is golden and cracked, the strawberries are bubbling around the edges, and a toothpick inserted in the center comes out with moist crumbs, not raw batter.
4. Can I use different types of chocolate?
Yes, you can swap semi-sweet chocolate chips with dark or milk chocolate. Expect different intensities of sweetness and smoky richness in every bite.
5. How should I store leftovers?
Refrigerate leftovers in an airtight container for up to 3 days. For best texture, serve at room temperature, allowing the filling to soften and flavors to deepen.
6. What if the top burns or the strawberries stick?
If the topping darkens too fast, loosely tent with foil. For sticky strawberries, add a sprinkle of powdered sugar or a splash of lemon juice to brighten flavors.
7. What tools are essential for making this cake?
Use a springform pan for easy removal, a spatula to spread batter evenly, and a sharp knife for clean slicing after cooling.
8. How do I fix a runny filling?
When strawberries release too much juice, sprinkle a little flour over them before layering to absorb moisture and prevent sogginess.
9. Can I prepare this cake in advance?
To make ahead, prep the crumb topping and assemble the cake without baking. Cover tightly and refrigerate up to 24 hours before baking.
10. What quick fixes can I try if something goes wrong?
When the cake cracks or the strawberries aren’t as vibrant, gently adjust by adding an extra layer of strawberries or dusting with powdered sugar just before serving.
Baking this cake feels like a little act of chaos—watching the strawberries burst and the top crack open, revealing that gooey, chocolatey chaos inside. It’s a dessert that celebrates imperfection, just like those wild natural moments we all experience.
Sharing it with friends or family, you get that look of surprise and delight—like witnessing a mini earthquake of flavor. It’s a messy, vibrant treat that reminds me to embrace the unpredictable beauty in both baking and life.

Hi, I’m Katie Dawson, the owner, cook, and storyteller behind Little More Lovely. I run a small café in a cozy corner of Seattle, where the smell of freshly baked bread meets the hum of neighborhood chatter. I’ve spent years learning how food can bring people together, both as a professional and as someone who loves to share meals with family and friends.

