Get ready to embark on a culinary adventure with our mouthwatering cheeseburger recipe that promises to satisfy all your cravings. Whether you’re a beginner eager to master the grill or an experienced cook looking for a new twist, this recipe is your ticket to burger bliss. Imagine the sizzle of beef patties, the melt of cheddar, and the zing of homemade sauce marrying in perfect harmony.
What makes this cheeseburger truly special is its irresistible combination of flavors and textures. With juicy patties seasoned to perfection, a touch of smoky bacon, and a hint of tangy pickles, each bite offers an explosion of taste. Trust us, with this recipe in your hands, you’ll effortlessly create a burger that’s not just a meal, but a sensory delight.
About This cheeseburger Recipe
- Quick and Easy: This cheeseburger recipe is perfect for busy weeknights, taking just 30 minutes from start to finish.
- Juicy and Flavorful: Each bite is packed with a blend of spices and seasonings that make the burger irresistibly juicy and delicious.
- Customizable Toppings: You can easily tailor the toppings to your taste, making it a family-friendly option that suits everyone’s preferences.
- Simple Ingredients: Uses pantry staples and fresh ingredients, making it both budget-friendly and convenient.
- Grill or Pan-Fry: Enjoy flexibility in cooking methods, whether you prefer the smoky flavor from the grill or the convenience of a stovetop.
Why You’ll Love This Recipe
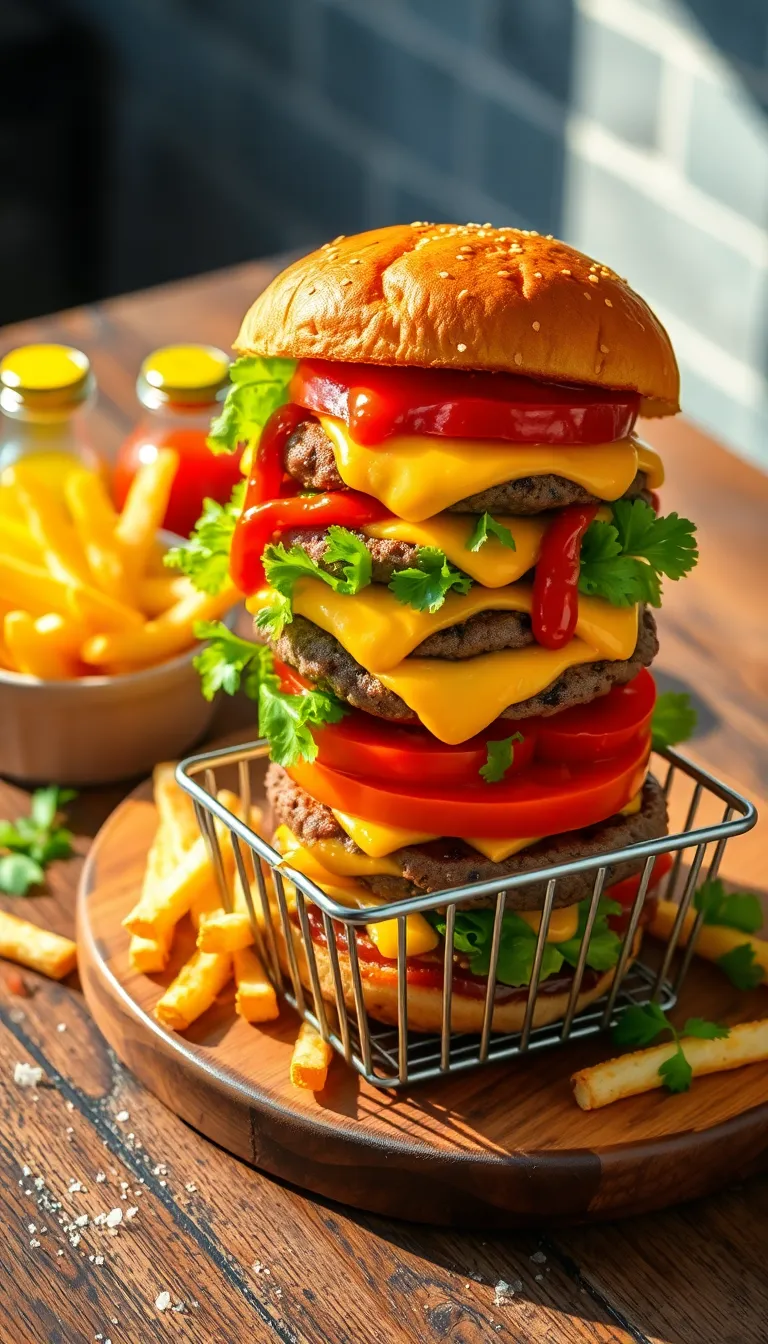
- Unmatched Flavor: This cheeseburger recipe combines juicy, seasoned beef patties with melted cheese, offering a taste sensation that’s both savory and satisfying.
- Quick and Easy: Perfect for busy weeknights, this recipe can be prepared in under 30 minutes without compromising on deliciousness.
- Customizable Toppings: From classic lettuce and tomato to gourmet options like caramelized onions and avocado, you can personalize your burger to suit any taste preference.
- Family-Friendly: This cheeseburger is a guaranteed hit with both kids and adults alike, making it an ideal choice for family dinners or casual gatherings.
- High-Quality Ingredients: Using fresh, wholesome ingredients ensures every bite is packed with nutrients and flavor, making it a healthier option compared to fast-food alternatives.
Ingredients
Ingredients
- 1 lb ground beef (80/20 blend recommended for juiciness)
- 1 tsp salt
- 1/2 tsp black pepper
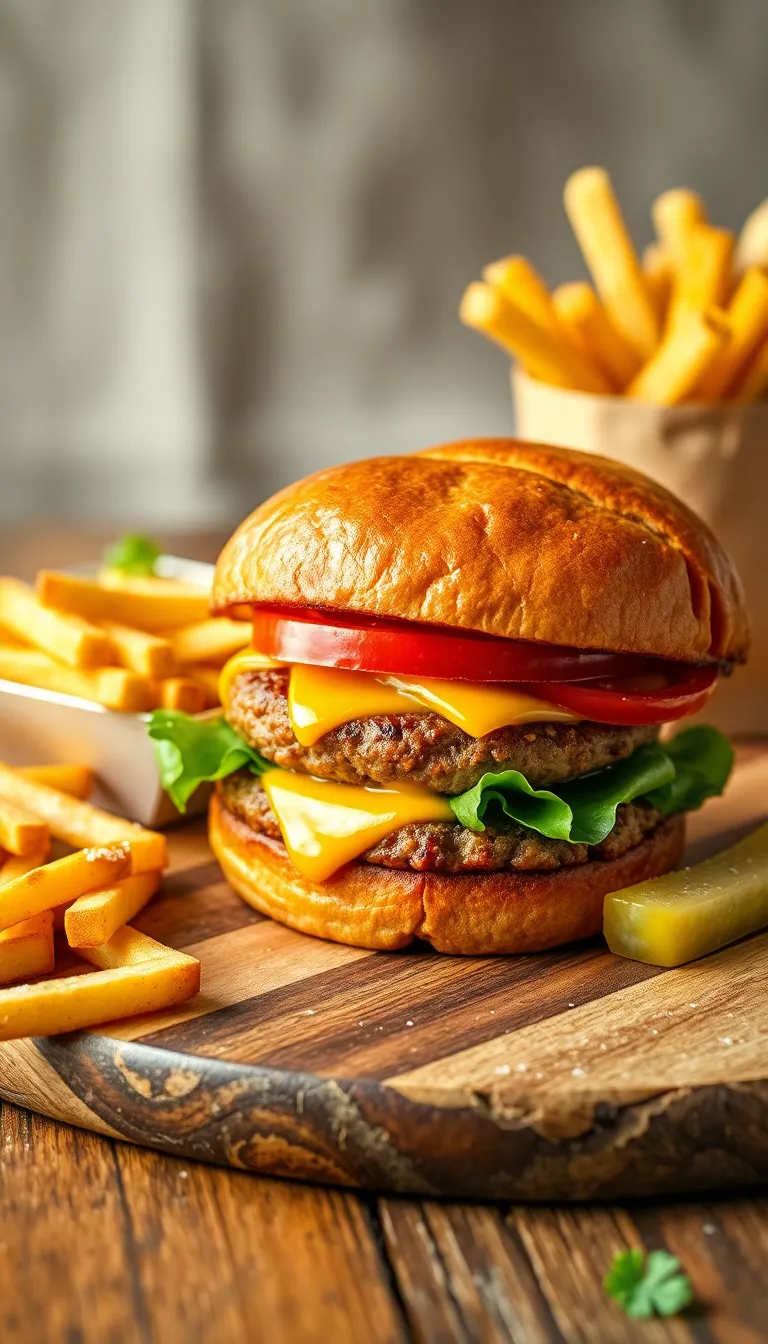
- 4 hamburger buns (brioche buns for extra flavor)
- 4 slices American cheese (substitute with cheddar or Swiss if preferred)
- 1 tbsp vegetable oil (for grilling or pan-frying)
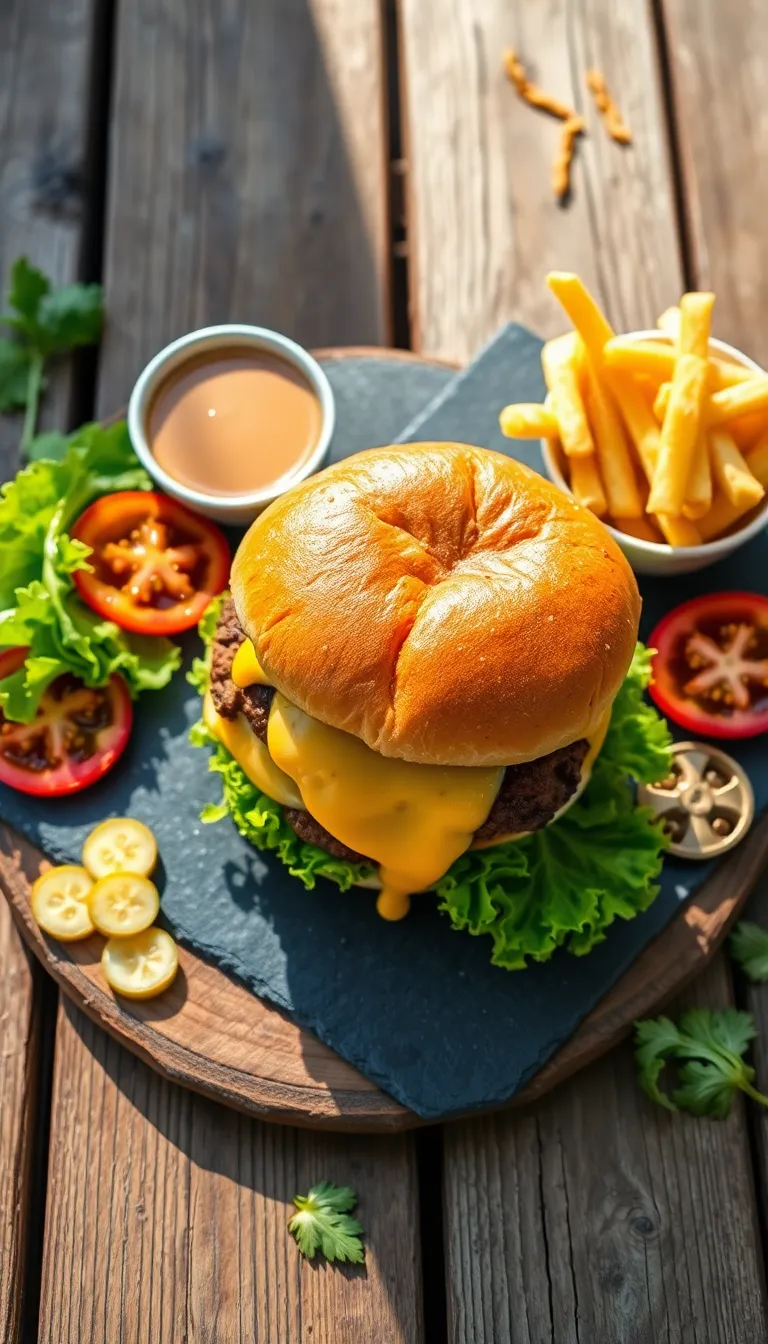
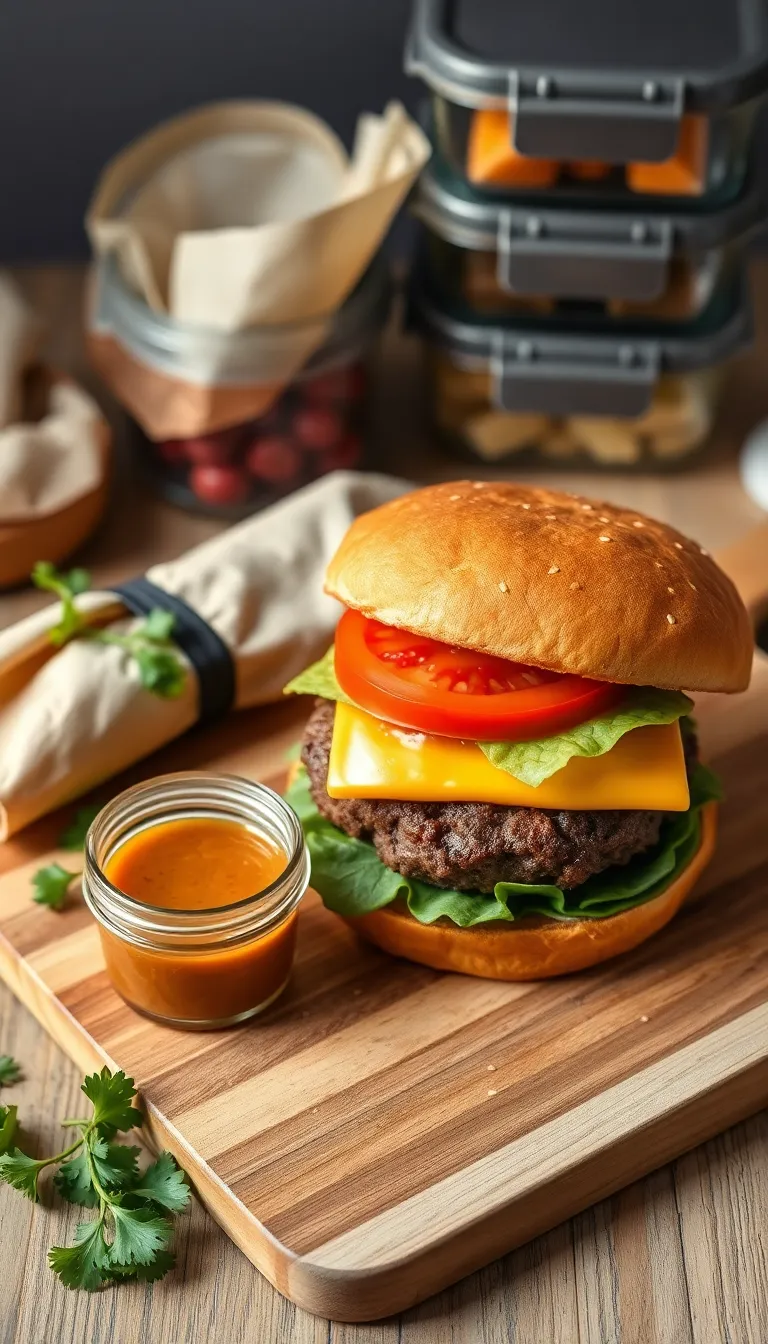
- 1 large tomato, sliced
- 1 small onion, sliced (red onion adds a sweet, mild flavor)
- 4 lettuce leaves
- 1/4 cup mayonnaise (optional)
- 1/4 cup ketchup (optional)
- 1 tbsp mustard (optional)
- Pickles, as desired (optional, adds crunch and tanginess)
- 4 strips bacon (optional, cooked until crispy)
Kitchen Tools You’ll Need
- Skillet or Grill Pan: Essential for cooking the burger patties to achieve a nice sear and juicy center. If you don’t have a grill pan, a regular cast-iron or non-stick skillet works well too.
- Spatula: Used for flipping the burger patties without breaking them. A wide, flat spatula is ideal for easy handling.
- Mixing Bowl: Necessary for combining ground beef with seasoning to ensure even distribution of flavors.
- Meat Thermometer: Helps to check the internal temperature of the patties to ensure they are cooked to your desired doneness. If unavailable, use the touch test method for doneness.
- Knife: For slicing toppings like tomatoes, onions, and lettuce. A sharp chef’s knife is recommended for clean, even cuts.
- Cutting Board: Provides a stable surface for slicing and dicing your toppings and other ingredients.
- Baking Sheet: Useful if you plan to toast the burger buns in the oven for a crispy texture. Alternatively, toast them in a skillet.
Preparation Steps
- Preheat the grill to medium-high heat, around 375°F (190°C). This ensures the burgers cook evenly and develop a nice crust.
- Form ground beef into patties, each about 3/4-inch thick, and make a small indentation in the center of each to prevent puffing up during cooking.
- Season both sides of the patties generously with salt and pepper just before grilling to enhance the beef flavor.
- Place the patties on the hot grill and cook for about 3-4 minutes per side for medium-rare, or until juices run clear and the internal temperature reaches 160°F (71°C) for well-done burgers.
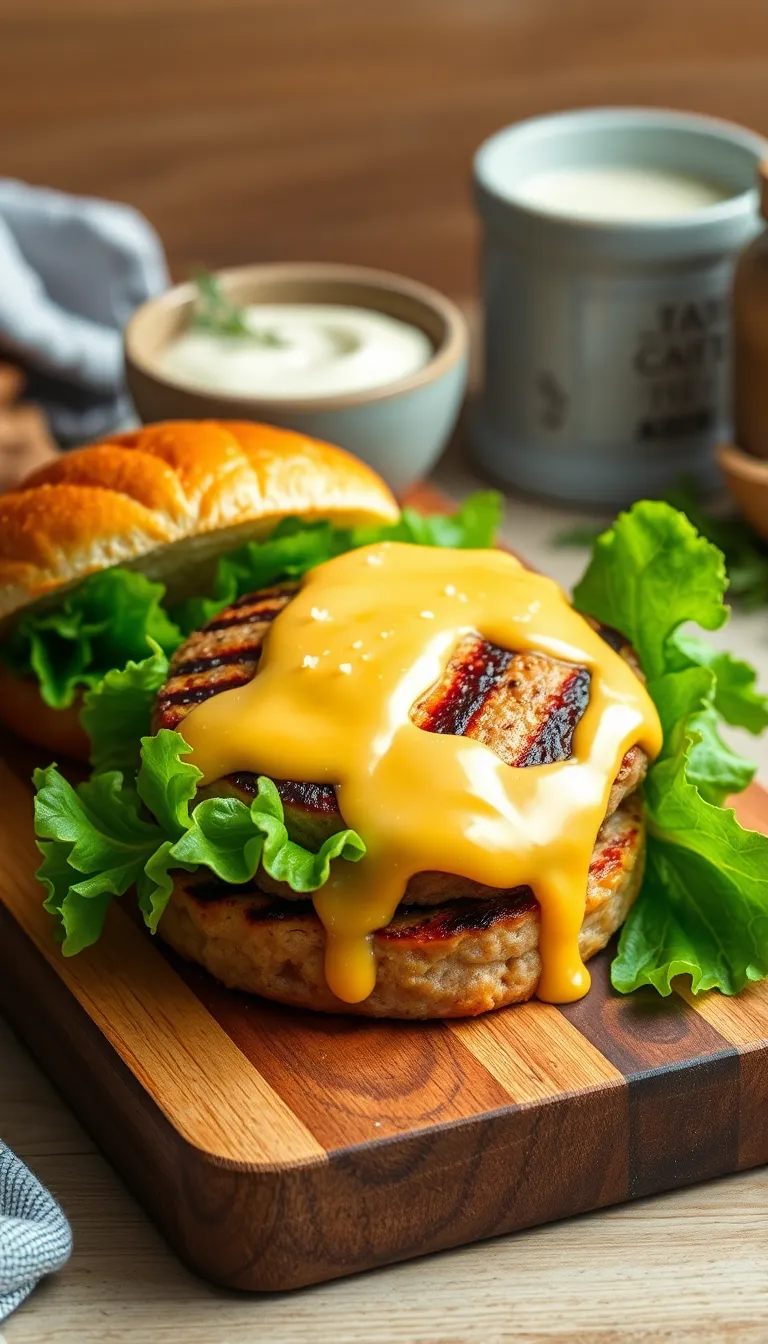
- Add cheese slices on top of the patties during the last minute of cooking, closing the grill lid to melt the cheese completely.
- Toast hamburger buns on the grill for about 1 minute, until they are golden brown and slightly crisp.
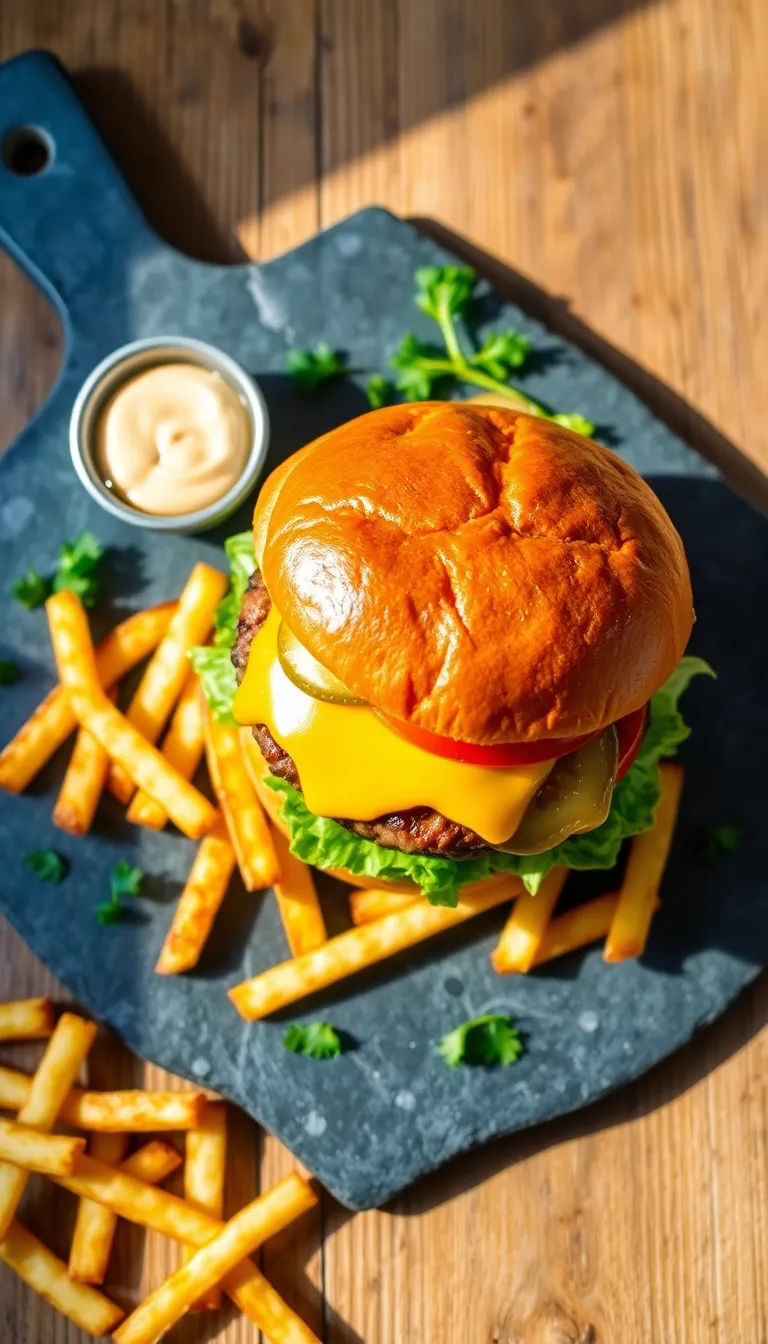
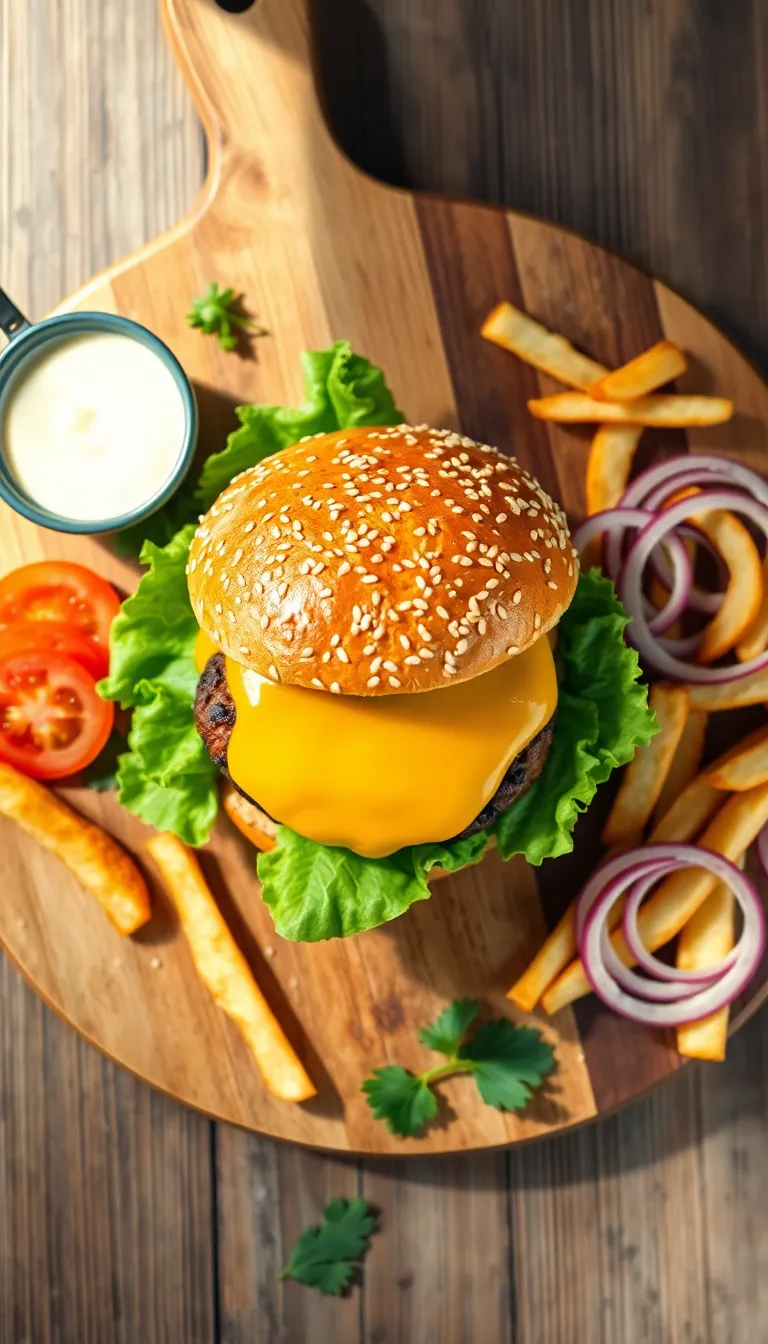
- Assemble the cheeseburgers by placing the patties on the bottom buns, adding desired toppings like lettuce, tomato, onions, and condiments before closing with the top buns.
Serving Suggestions
- Classic French Fries: Serve your cheeseburger with a side of crispy French fries. The salty crunch complements the juicy burger perfectly and is a traditional pairing that never disappoints.
- Coleslaw: Add a side of creamy coleslaw for a refreshing contrast. The tangy, crisp cabbage salad balances the richness of the cheeseburger, making it an excellent choice for summer barbecues or picnics.
- Pickled Vegetables: Garnish your cheeseburger with pickled onions, jalapeños, or cucumbers. The acidity from the pickles cuts through the fat of the cheese and beef, adding a burst of flavor and a pop of color.
- Craft Beer: Pair your cheeseburger with a chilled craft beer. The carbonation and flavors in beer enhance the savory notes of the burger, making it a popular beverage choice for casual gatherings.
- Sweet Potato Wedges: For a slightly healthier option, try serving sweet potato wedges. Their natural sweetness complements the savory burger, offering a nutritious and delicious twist.
- Garden Salad: Accompany your cheeseburger with a fresh garden salad. The crisp, vibrant veggies and a light vinaigrette dressing provide a refreshing contrast to the hearty burger, ideal for a balanced meal.
Pro Tips for Perfect Results
- Choose the Right Meat: Opt for ground beef with a fat content of 80/20. This balance ensures juiciness and flavor, preventing the burgers from drying out during cooking.
- Chill Your Patties: After forming your burger patties, refrigerate them for at least 30 minutes. This helps the patties hold their shape better during cooking and enhances the texture.
- Create an Indentation: Use your thumb to make a small indentation in the center of each patty. This prevents the burgers from puffing up and allows them to cook evenly.
- Season Just Before Cooking: Salt draws out moisture, so season your patties with salt and pepper only right before they hit the grill or pan to maintain their juiciness.
- Melt the Cheese Properly: Place a slice of cheese on the patty during the last minute of cooking and cover the grill or skillet with a lid. This traps the heat and perfectly melts the cheese.
- Prep Condiments Ahead: Chop and prepare all your condiments and toppings in advance. This not only streamlines the assembly process but also allows flavors to meld, enhancing the overall taste.
Common Mistakes to Avoid
- Overcrowding the Pan: This mistake happens when too many burger patties are cooked at once, leading to steaming instead of searing. To avoid this, cook the patties in batches, leaving space between each one. This ensures a crispy exterior and juicy interior.
- Using Cold Meat: Cold meat doesn’t cook evenly and can result in tough burgers. Let the ground beef sit at room temperature for about 15-30 minutes before forming patties. This helps the meat cook more uniformly.
- Over-handling the Meat: Excessively mixing or pressing the meat can make burgers dense and tough. Gently shape the patties with minimal handling to maintain tender texture. Press a small indentation in the center of each patty to prevent them from puffing up.
- Not Preheating the Grill or Pan: Cooking on a cool surface prevents proper searing and can cause the burgers to stick. Always preheat your grill or pan until hot before adding the patties. This ensures a delicious crust forms on the burgers.
- Skipping the Resting Time: Cutting into the burgers immediately after cooking causes juices to escape, resulting in dry burgers. Allow the burgers to rest for about 5 minutes off the heat. This locks in the juices and enhances the overall flavor.
Final Thoughts: By avoiding these common mistakes, you’ll be well on your way to creating the perfect cheeseburger. Remember, a few simple adjustments in technique and timing can make all the difference in achieving a juicy and flavorful burger. Happy cooking!
Storage and Reheating Tips
- Allow the cheeseburgers to cool to room temperature before storing. Do not leave them out for more than 2 hours to avoid bacterial growth.
- Place the cheeseburgers in an airtight container or wrap them tightly in aluminum foil or plastic wrap.
- Store the cheeseburgers in the refrigerator for up to 3 days. Ensure the refrigerator is set to 40°F (4°C) or below to maintain safety.
- If you want to freeze the cheeseburgers, wrap each one individually in plastic wrap, then place them in a zip-top freezer bag. Label with the date and freeze for up to 3 months.
- To reheat refrigerated cheeseburgers, preheat your oven to 350°F (175°C). Wrap the burger in aluminum foil to retain moisture and heat for about 10-15 minutes until warmed through.
- For a quicker method, use a microwave on medium power. Place the burger on a microwave-safe plate, cover with a damp paper towel, and heat in 30-second intervals until hot.
- To reheat frozen cheeseburgers, thaw them overnight in the refrigerator before following the oven or microwave reheating instructions.
- Always ensure that the internal temperature of the reheated cheeseburger reaches 165°F (74°C) to ensure safety.
Frequently Asked Questions

Q: Can I use a different type of cheese for my cheeseburger?
- Yes, you can substitute with any cheese that melts well, like Swiss, cheddar, or pepper jack.
Q: What is the best way to keep my burger patties from falling apart?
- Mix the ground beef gently and avoid overworking it; adding a beaten egg can also help bind the patties.
Q: How do I know when my burger is cooked to the right doneness?
- Use a meat thermometer to check the internal temperature: 160°F for well-done, 145°F for medium-rare.
Q: Can I make the burger patties ahead of time?
- Yes, you can shape the patties and store them in the fridge for up to 24 hours before cooking.
Q: What are some good toppings to add to my cheeseburger?
- Common toppings include lettuce, tomato, onion, pickles, bacon, and a variety of sauces like ketchup or mustard.
Q: Can I cook the burgers on something other than a grill?
- Yes, you can cook them in a skillet on the stovetop or bake them in the oven at 400°F for about 15 minutes.
Final Thoughts
This cheeseburger recipe is a classic with a twist, offering a perfect blend of juicy beef, melted cheese, and fresh toppings. What makes this recipe special is its simplicity combined with the opportunity for endless customization, allowing you to enjoy a delicious burger that’s tailored to your taste. It’s the perfect balance of flavors and textures that will surely satisfy any burger craving.
Feel free to experiment with different cheeses, toppings, and sauces to make this burger truly your own. Whether you prefer a sharp cheddar, a smoky gouda, or a spicy pepper jack, each choice adds a unique flair. Don’t be afraid to get creative and add your personal touch to this timeless favorite.
So, gather your ingredients, fire up the grill or stovetop, and enjoy crafting a cheeseburger that’s both delicious and satisfying. We warmly invite you to try this recipe and discover why it’s a favorite among burger enthusiasts. Happy cooking!

Hi, I’m Katie Dawson, a paediatric speech-language pathologist by day and a passionate food storyteller by night. Based in Seattle but with a love for global flavours (and a soft spot for Indian chai), I created this blog to bridge the gap between therapeutic nutrition and the simple joy of eating.
