Making S’mores Bars means spreading a graham cracker crust into the pan, then pressing down hard enough to make it compact. Expect a lot of crumbling if you’re not careful, especially around the edges. The marshmallow layer gets sticky and puffs up as it melts under the broiler, so watch it closely.
Pouring the melted chocolate over the marshmallow is a messy, satisfying step, with drips running down the sides. Cleaning up the spatula and your fingers afterward feels like battling a small, sweet war, but it’s worth every wipe.
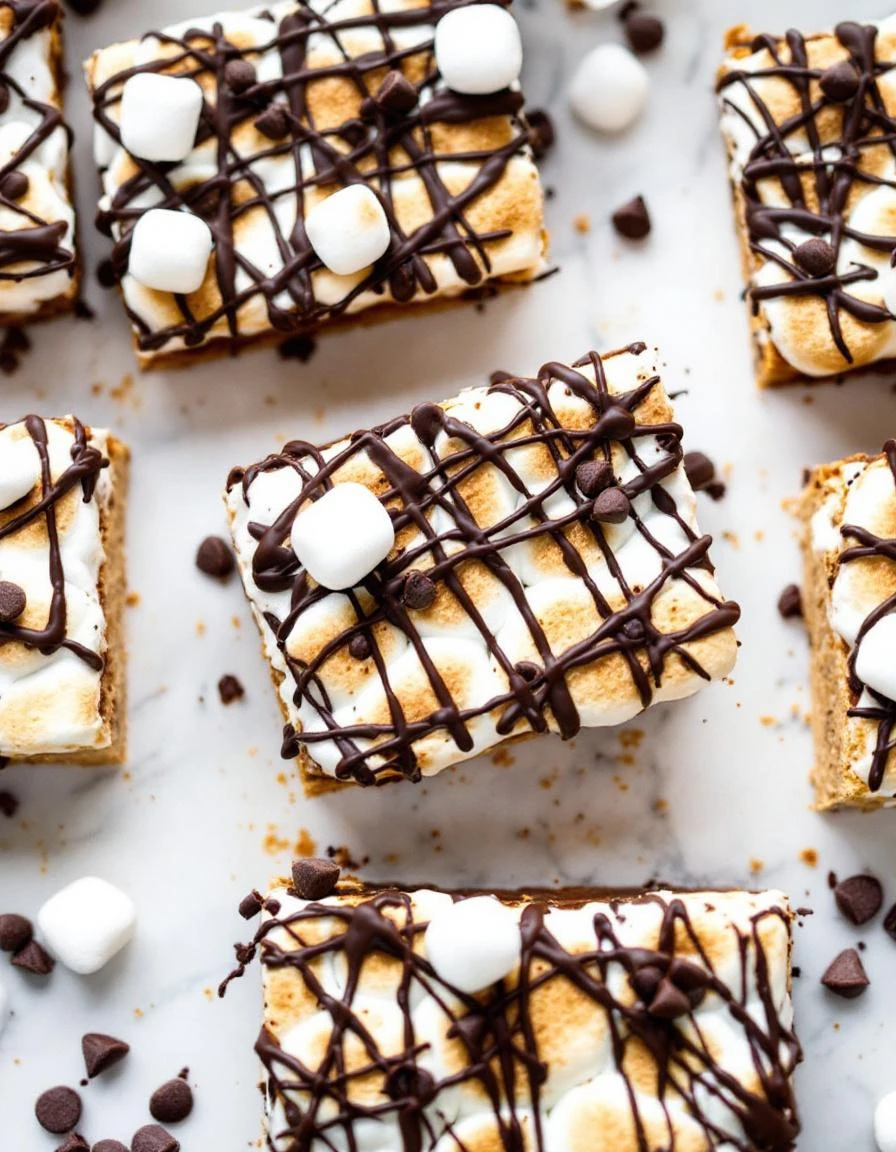
The sticky, gooey mess of melted chocolate and toasted marshmallow that sticks to the spatula and your fingers, making every step feel like a small battle against the sweet, sticky chaos.
What goes into this dish
- Graham cracker crumbs: I use a food processor to get fine crumbs that press evenly into the pan. Skip this step if you have pre-made crumbs, but you’ll miss that satisfying crunch in every bite.
- Marshmallows: I prefer the big, fluffy white ones—they melt into a gooey cloud that sticks to everything. For a smoky flavor, try toasting them lightly before pressing down, but skip if you want a softer finish.
- Chocolate chips: I go for semi-sweet, but dark chocolate will deepen the flavor. If you want less mess, chop a chocolate bar instead—less melting around the edges, more controlled goo.
- Butter: I melt unsalted butter until it’s golden and fragrant—adds richness and helps the crust stick together. Use margarine if dairy isn’t your thing, but it won’t have that buttery aroma.
- Vanilla extract: I add a splash to enhance the chocolate flavor, making it more fragrant and rounded. No vanilla? A pinch of almond extract gives a different but nice depth, just don’t overdo it.
- Salt: I sprinkle a tiny pinch into the crust mixture to balance the sweetness. Skip salt if you’re watching your sodium intake, but your bars might taste dull without it.
- Optional toppings: Crushed graham crackers, mini chocolate chips, or even a drizzle of caramel on top—add texture and visual appeal, but keep it simple if you want that classic s’mores vibe.
S'mores Bars
Ingredients
Equipment
Method
- Combine the graham cracker crumbs with the melted butter and a pinch of salt in a mixing bowl, stirring until the mixture is evenly coated and crumbly.
- Press the crumb mixture firmly into the bottom of a greased 9x13 inch baking pan, creating an even, compact crust. Chill in the refrigerator while you prepare the marshmallow layer.
- Spread the marshmallows evenly over the chilled crust, making sure to cover all areas for a gooey topping.
- Place the pan under the broiler, watching carefully as the marshmallows puff up and turn golden brown—this should take about 2-3 minutes. Remove once toasted and set aside to cool slightly.
- In a microwave-safe bowl, melt the chocolate chips with the vanilla extract in 30-second intervals, stirring until smooth and glossy.
- Pour the melted chocolate mixture over the toasted marshmallow layer, spreading it evenly with a spatula for a glossy, drippy finish.
- Allow the bars to set at room temperature for about 1 hour, or refrigerate for quicker firming. Once the chocolate is firm and the marshmallow is slightly sticky, slice into squares and serve.
Common mistakes and how to fix them
- FORGOT to butter the pan, resulting in sticking—grease it well before pressing in the crust.
- DUMPED marshmallows directly into the hot chocolate—stir gently to avoid burning and clumping.
- OVER-TORCHED the marshmallow layer—keep a close eye, it turns bitter and crispy fast.
- MISSED the chill time—refrigerate to set the bars firmly, making slicing easier and cleaner.
Make-Ahead and Storage Tips
- You can prepare the crust and press it into the pan a day ahead. Wrap tightly and keep at room temperature.
- The bars can be stored in an airtight container in the fridge for up to 3 days. The marshmallow may soften slightly, but the chocolate stays firm and gooey.
- For longer storage, freeze the bars wrapped well in plastic wrap and foil—up to 1 month. Thaw in the fridge before slicing.
- Reheat slices gently in the microwave—30 seconds at a time—until the chocolate just starts to melt and the marshmallow warms through, with a soft, fragrant aroma.
- Note that freezing can dull the marshmallow’s fluffiness slightly, but the chocolate remains rich and gooey upon reheating.
FAQs
1. How should the marshmallow texture feel?
The marshmallow gooeyness is what makes these bars sticky and sweet. When biting in, the soft marshmallow melts in your mouth with a slight chew, releasing that toasted aroma.
2. What’s the ideal chocolate consistency?
The chocolate should be glossy and slightly melted, with a rich, velvety feel on your tongue. It might firm up as it cools, but when warm, it’s smooth and luscious.
3. How does the crust texture work?
The crust should be firm yet crumbly, giving way with a gentle press. It should hold together but crumble slightly when you bite into it, adding crunch to each chew.
4. How do I reheat without losing texture?
When reheating, warm the slice until the chocolate just starts to shimmer and the marshmallow softens. It should smell rich and sweet, with a slight toasty scent from the marshmallow.
5. How long can I store the bars?
Keep the bars airtight in the fridge for up to 3 days. They may soften slightly, but the flavors stay cozy and the chocolate remains gooey if warmed gently before serving.

Hi, I’m Katie Dawson, the owner, cook, and storyteller behind Little More Lovely. I run a small café in a cozy corner of Seattle, where the smell of freshly baked bread meets the hum of neighborhood chatter. I’ve spent years learning how food can bring people together, both as a professional and as someone who loves to share meals with family and friends.

