Making vanilla bean ice cream means dealing with the mess of scraping seeds and stirring custard until it thickens, often splattering on the stove. It’s a slow process, but watching that rich cream turn smooth and glossy makes it worth the fuss.
Once cooled, I pour the mix into the churn, which sometimes sputters or leaks if not secured right. Then comes the waiting—patience for the ice to do its work, and for the texture to turn firm and scoopable.
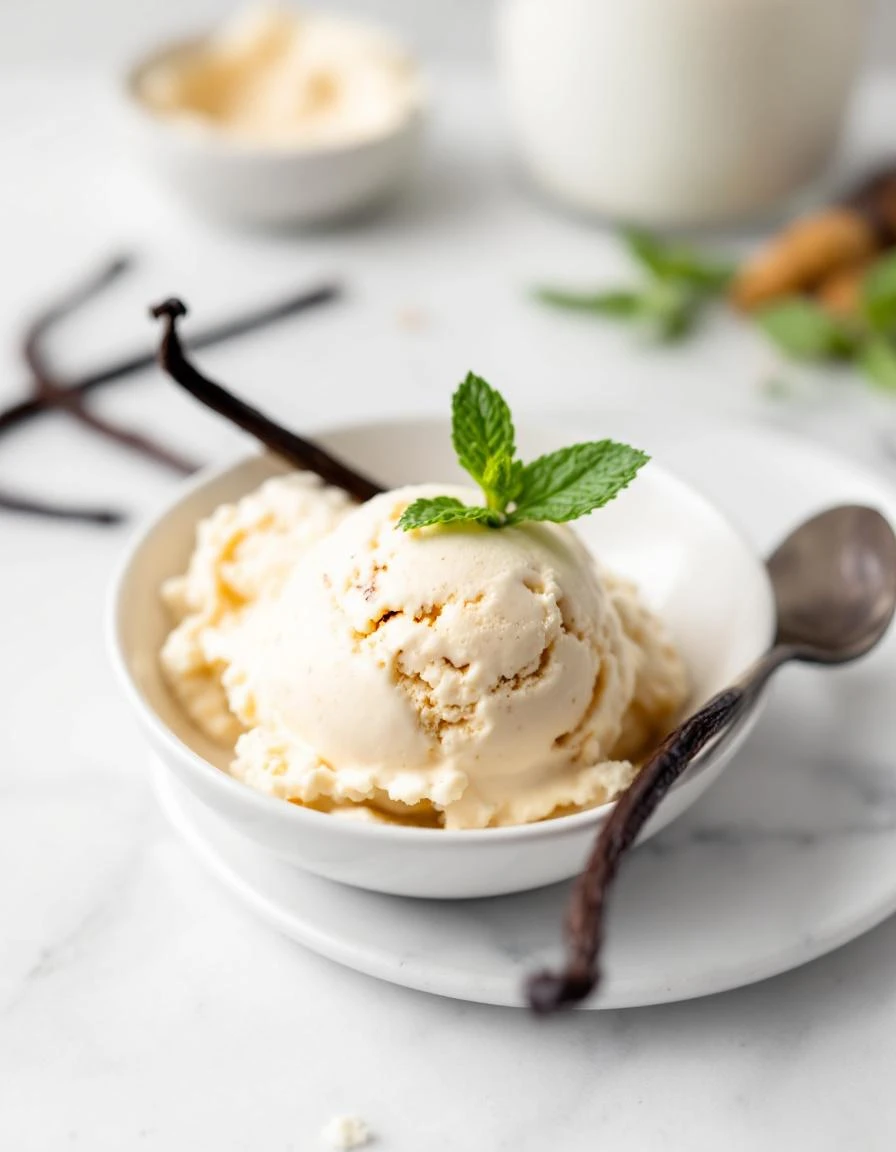
The gentle sound of cream swirling as I fold in the vanilla seeds, each tiny pod bursting with a pop of fragrant oil.
Core Ingredients and Variations
- Heavy cream: I love the richness of full-fat cream, it makes the ice cream velvety. If you want a lighter version, swap in half-and-half, but expect a less creamy bite.
- Whole milk: The backbone of the custard, it tempers the cream’s richness. Use skim milk for a lighter feel, but the texture won’t be as lush.
- Sugar: Granulated sugar dissolves into the custard, balancing the flavors. Brown sugar adds a caramel note if you’re feeling cozy, but skip it for classic sweetness.
- Vanilla beans: Scraping out the seeds fills the kitchen with that sweet, floral aroma. Vanilla extract works in a pinch but misses that intense seed speckle and aroma.
- Egg yolks: They thicken the custard, giving it body. For allergy concerns, try cornstarch as a thickener—loses some richness but still good.
- Salt: Just a pinch heightens the vanilla and cuts through the sweetness. Skip if you’re avoiding salt, but it really rounds out the flavor.
- Optional add-ins: Chocolate chips, berries, or swirls of caramel—stir them in after churning for bursts of flavor. Keep in mind, mix-ins can freeze into icy clumps if overdone.
Homemade Vanilla Bean Ice Cream
Ingredients
Equipment
Method
- Start by splitting the vanilla beans lengthwise and scraping out the tiny seeds with the back of a knife.
- Combine the cream, milk, half of the sugar, vanilla seeds, and the split vanilla pods in a saucepan. Heat over medium, stirring gently, until the mixture just begins to simmer and is fragrant.
- While the mixture heats, whisk the egg yolks with the remaining sugar and salt until smooth and slightly paler in color.
- Slowly pour a ladle of the hot cream into the yolk mixture, whisking constantly to temper the eggs and prevent curdling.
- Gradually pour the tempered egg mixture back into the saucepan, stirring constantly, and cook gently until the custard thickens slightly and coats the back of a spoon, about 5 minutes.
- Remove from heat, take out the vanilla pods, and pour the custard through a fine-mesh sieve into a clean bowl to strain out any cooked egg bits.
- Stir in the vanilla seeds from the scraped pods for an intense vanilla aroma, then let the custard cool to room temperature.
- Cover the bowl with plastic wrap and refrigerate for at least 4 hours or overnight to let flavors meld and custard chill thoroughly.
- Once chilled, pour the custard into your ice cream maker and churn according to the manufacturer’s instructions until it reaches a soft, creamy consistency.
- Transfer the soft ice cream to a freezer-safe container, smoothing the top with a spatula, then freeze for at least 4 hours until firm and scoopable.
- Before serving, let the ice cream sit at room temperature for 5-10 minutes to soften slightly for easier scooping.
Common mistakes and how to fix them
- FORGOT to chill the custard fully before churning, leading to icy ice cream. Fix: Chill at least 4 hours or overnight.
- DUMPED in too much sugar without tasting, resulting in overly sweet ice cream. Fix: Adjust sweetness after tasting the custard.
- OVER-TORCHED the custard on high heat, causing curdling. Fix: Cook gently over medium heat, stirring constantly.
- SKIPPED the vanilla seeds, missing the intense aroma. Fix: Scrape seeds from pods for maximum flavor.
Make-Ahead and Storage Tips
- Prepare the custard base a day ahead; it tastes richer after resting overnight in the fridge.
- Freeze the ice cream container at least 24 hours before churning, so it’s ice-cold when needed.
- Cover the churn bowl or storage container tightly; flavors may deepen or mute after a day in the freezer.
- Ice cream can be stored for up to 2 weeks; beyond that, it may develop freezer burn or lose creaminess.
- Refrigerate for 15-20 minutes before serving if it’s too firm; it softens quickly and regains scoopability.
FAQs
1. How does vanilla smell when preparing the beans?
The smell of fresh vanilla beans is warm and floral, with a slightly sweet, almost honeyed scent that fills the kitchen as you scrape the seeds.
2. What texture should the custard and ice cream have?
The custard should feel silky and smooth, coating the spoon evenly without any lumps. When churning, listen for a gentle slush that thickens gradually.
3. How do I know when the ice cream is ready?
The ice cream will turn creamy and firm, with a slight resistance on the tongue, and the vanilla seeds will be visible speckled throughout.
4. What should I do if the ice cream is too icy?
If the mixture freezes into icy chunks, let it sit at room temperature for a few minutes and stir gently before serving.
5. Can I prepare this ahead of time?
The flavor deepens if you let the custard rest overnight in the fridge, developing a richer vanilla aroma and smoother texture.

Hi, I’m Katie Dawson, the owner, cook, and storyteller behind Little More Lovely. I run a small café in a cozy corner of Seattle, where the smell of freshly baked bread meets the hum of neighborhood chatter. I’ve spent years learning how food can bring people together, both as a professional and as someone who loves to share meals with family and friends.

