Buffalo Jalapeño Poppers are a tricky balance of fiery heat and creamy coolness, and I love how they can turn a simple snack into something memorable. The key is in choosing the right cheese that melts smoothly and complements the spicy peppers without overpowering them. It’s a dish that’s as much about the texture as it is about that punch of flavor.
I first started making these when I wanted something more than just chips and dip at a party. The reaction was immediate—people couldn’t get enough of that smoky, spicy kick with a hit of rich cheese. Over time, I tweaked the filling to get that perfect harmony of heat and creaminess, and now they’re a staple whenever I want to impress without fuss.
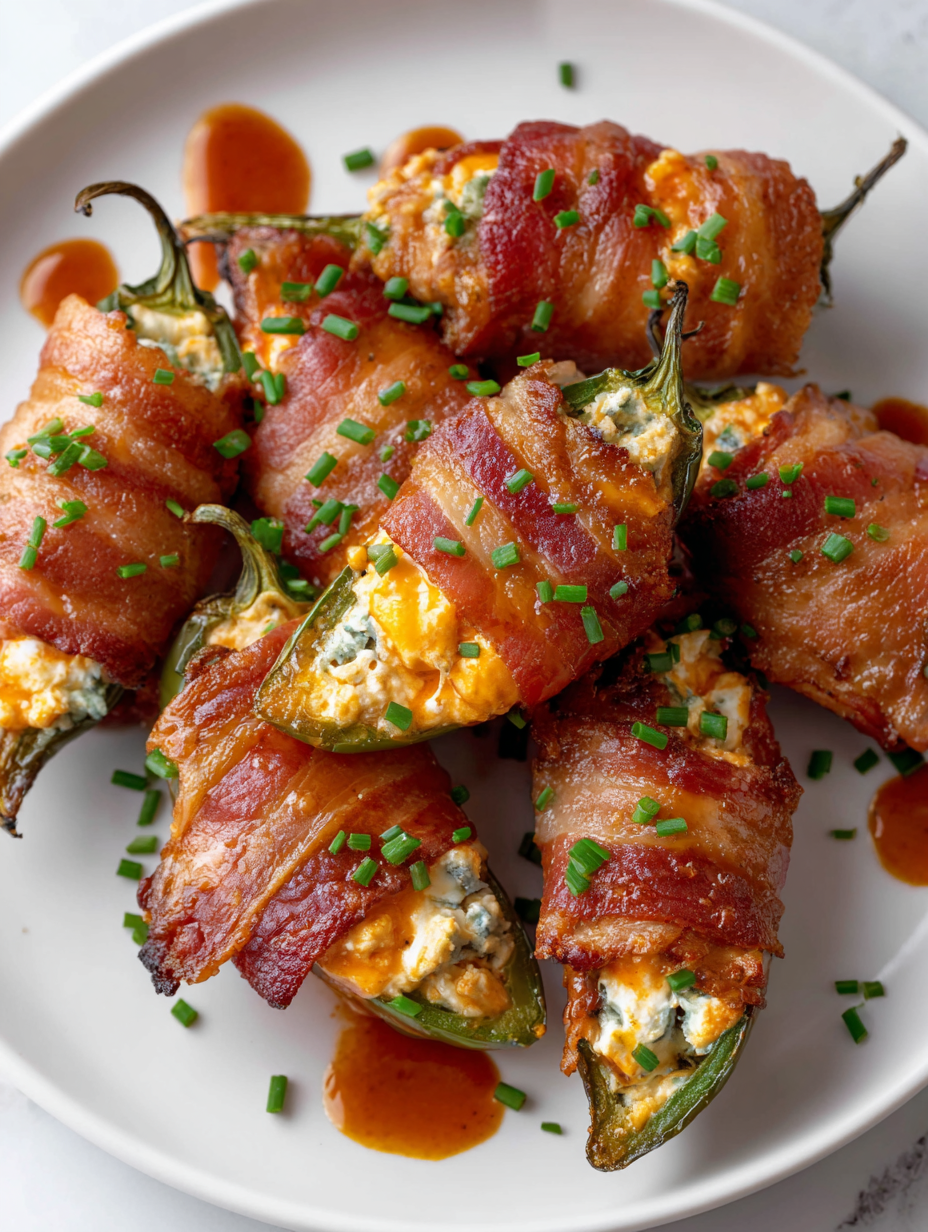
Focusing on the balance between heat and creaminess, this recipe explores how the right cheese and spice combo can elevate simple jalapeño poppers into a complex, satisfying snack.
The inspiration behind these poppers
- This recipe was born out of a lazy weekend experiment, trying to combine my love for spicy snacks with a craving for something smoky and cheesy. I remember the first time I stuffed jalapeños with a fiery buffalo-seasoned cream cheese and baked them until bubbly—their aroma filled the kitchen and made me realize I’d found a keeper.
- Years ago, I hosted a game night where I threw these together last minute. The heat from the jalapeños, balanced by the cool, tangy dip, made everyone stop mid-game for a snack break. That moment of everyone reaching for seconds is what keeps me coming back to this recipe—it’s honest, messy, and utterly satisfying.
- heading:
Ingredient breakdown: key components
- Cream cheese: I love how it turns silky and rich when softened. For a tangier kick, try a bit of Greek yogurt—just don’t skip the creaminess.
- Jalapeños: I pick firm, bright green peppers with smooth skins. If they’re too soft or wrinkled, they might be past their prime and too mild or too bitter.
- Buffalo sauce: I use a good-quality, vinegary hot sauce that shimmers with tang. If yours is too thick or dull, add a splash of vinegar or hot sauce for that lively punch.
- Cheddar cheese: I prefer sharp, aged cheddar for a deeper flavor, but a milder cheese will keep it creamy and mellow. Grate it fine so it melts quickly and evenly.
- Breadcrumbs: I sprinkle just a little on top for crunch. For extra smoky flavor, toss them with a touch of smoked paprika or chili powder before baking.
- Garlic powder: I use freshly ground or good-quality powder for that warm, aromatic hit. Skip it if you’re sensitive to garlic, but I find it deepens the overall flavor.
- Optional: Blue cheese crumbles or chopped chives add a punch of flavor if you want to elevate the classic. Just a few bits go a long way to keep it balanced.
Spotlight on key ingredients
Cream cheese:
- I love how it turns silky and rich when softened. For a tangier kick, try a bit of Greek yogurt—just don’t skip the creaminess.
- Jalapeños: I pick firm, bright green peppers with smooth skins. If they’re too soft or wrinkled, they might be past their prime and too mild or too bitter.
Buffalo sauce:
- I use a good-quality, vinegary hot sauce that shimmers with tang. If yours is too thick or dull, add a splash of vinegar or hot sauce for that lively punch.
- Jalapeños: I pick firm, bright green peppers with smooth skins. If they’re too soft or wrinkled, they might be past their prime and too mild or too bitter.
Notes for ingredient swaps
- Dairy-Free: Swap cream cheese for coconut cream or cashew-based cheese. Expect a slightly different texture, but still creamy and rich.
- Vegan: Use plant-based cheese and a vegan buffalo sauce. Flavors remain bold, but the cheese may be less gooey.
- Gluten-Free: Omit breadcrumbs or replace with crushed gluten-free crackers or almond flour for crunch without gluten.
- Lower Sodium: Choose low-sodium buffalo sauce and cheese. The dish will be less salty but still flavorful with proper seasoning.
- Extra Heat: Add a splash of hot sauce or chopped fresh jalapeños to the filling for an extra spicy kick. Be cautious, as heat level varies.
- Smoked Flavor: Incorporate smoked paprika or chipotle powder into the filling or topping to enhance smoky notes, especially if using milder peppers.
- Cheese Variations: Substitute with Monterey Jack or Pepper Jack for different melt qualities and flavor profiles, keeping the creamy texture.
Equipment & Tools
- Baking sheet: To hold the peppers during baking
- Parchment paper or silicone mat: Prevent sticking and make cleanup easier
- Small spoon or piping bag: To fill the jalapeños neatly
- Mixing bowl: To combine the cheese ingredients
- Oven thermometer (optional): To ensure accurate baking temperature
Step-by-step guide to Buffalo Jalapeño Poppers
- Preheat your oven to 200°C (390°F). Line a baking sheet with parchment or a silicone mat. Have a small bowl of water nearby to keep your hands moist, making handling the peppers easier.
- Slice jalapeños in half lengthwise. Scoop out seeds and membranes with a small spoon. For milder heat, remove all seeds; for more kick, leave some or all in.
- Mix cream cheese, buffalo sauce, shredded cheddar, garlic powder, and a pinch of salt in a bowl until smooth and cohesive. Taste and adjust buffalo sauce for heat and tang.
- Fill each jalapeño half generously with the cheese mixture. Use a small spoon or piping bag for cleaner, more even filling.
- Arrange the stuffed peppers on your prepared baking sheet, cut side up. Lightly sprinkle with breadcrumbs or smoked paprika for extra crunch and flavor.
- Bake in the oven for about 15-20 minutes, or until the cheese is bubbling and golden around the edges. The peppers should look soft, slightly blistered, with a cheesy, crackling top.
- Check for doneness by gently shaking a pepper; the filling should jiggle slightly but stay in place. The cheese should be melted and slightly caramelized.
- Remove from oven and let rest for 5 minutes. Serve warm, garnished with chopped chives or blue cheese crumbles if desired. Pair with a cold beer or crisp cider.
Let the poppers rest for 5 minutes to settle before serving. Plate them directly from the baking sheet, garnished with chopped herbs or cheese if desired. Serve warm for best flavor and texture.
How to Know It’s Done
- Cheese filling is bubbling and golden brown
- Jalapeños are soft but not mushy, with blistered skins
- Breadcrumbs are crispy and aromatic
Buffalo Jalapeño Poppers
Ingredients
Equipment
Method
- Preheat your oven to 200°C (390°F). Line a baking sheet with parchment paper or a silicone mat.
- Slice each jalapeño in half lengthwise and carefully scoop out the seeds and membranes with a small spoon. Keep the peppers steady and remove the seeds for milder heat, or leave some seeds in for extra spice.
- In a mixing bowl, combine softened cream cheese, buffalo sauce, grated cheddar, garlic powder, and a pinch of salt. Mix until smooth and well blended, tasting to adjust the buffalo sauce for desired heat and tang.
- Using a small spoon or piping bag, generously fill each jalapeño half with the cheese mixture, pressing slightly to ensure it's packed in well and smooth on top.
- Arrange the stuffed jalapeños on your prepared baking sheet, cut side up. Lightly sprinkle the tops with breadcrumbs for crunch and flavor if desired.
- Bake in the preheated oven for 15-20 minutes, or until the cheese is bubbling and the tops are golden brown. The peppers will soften and blister slightly, creating a smoky aroma.
- Once baked, remove the poppers from the oven and let them rest for about 5 minutes. The cheese will set slightly, making them easier to handle and serve.
- Garnish with chopped chives or blue cheese crumbles if you like, and serve warm. These poppers are best enjoyed right out of the oven, with their cheesy, crispy tops and spicy kick.
Tips and tricks for perfect poppers
- Bold the filling: Use room temperature cheese mixture for smooth, even filling that doesn’t crack during baking.
- Use a small spoon: For tidy, consistent stuffing, gently mound cheese into each jalapeño half, avoiding overflow.
- Bake until bubbly: Keep an eye on the cheese; it should be golden and slightly caramelized, not burnt or runny.
- Broil for extra crisp: For a crispy top, finish under the broiler for 1-2 minutes, watching closely to prevent charring.
- Handle peppers carefully: Use gloves or a paper towel when handling jalapeños to avoid irritation from capsaicin.
- Drain excess moisture: Pat peppers dry after washing to prevent soggy poppers and ensure crisp topping.
- Adjust spice level: Remove all seeds for milder poppers or leave some in for extra heat—test and taste as you go.
Common mistakes and how to fix them
- FORGOT to check pepper freshness → Use firm, bright peppers for best heat and flavor.
- DUMPED too much buffalo sauce → Balance heat by tasting and adjusting sauce quantity.
- OVER-TORCHED cheese topping → Remove once golden to prevent burning and bitterness.
- FAILED to remove seeds for milder heat → Seed removal controls spice level and avoids bitterness.
Quick fixes and pantry swaps
- When peppers are soft or wrinkled, toss them out for fresher, spicier poppers.
- Splash a bit of water on your hands when handling peppers to prevent capsaicin burn.
- Patch over burnt cheese with a quick sprinkle of fresh cheese and a minute under the broiler.
- DUMPED too much buffalo sauce? Balance with more cream cheese or a squeeze of lemon for brightness.
- Shield delicate toppings with foil if they start to over-brown or crackle too quickly.
Prep, store, and reheat tips
- Prepare the cheese filling and stuff the jalapeños a day ahead; keep covered in the fridge for up to 24 hours, maintaining freshness and preventing moisture loss.
- Store assembled but unbaked poppers in an airtight container in the fridge for up to 24 hours. The peppers stay crisp, and the flavors meld slightly overnight.
- Refrigerated poppers will develop a deeper, more integrated flavor; however, the cheese may firm up, so allow them to sit at room temperature for 10 minutes before baking.
- Reheat leftovers in a 180°C (350°F) oven for 10 minutes or until heated through. Expect the cheese to soften and the toppings to crisp up again, with a slight smoky aroma.
- For freezing, wrap unbaked poppers tightly in plastic wrap then foil. Freeze up to 3 months, and bake directly from frozen, adding 5-7 minutes to baking time. Expect a slightly less crisp topping but still delicious.
Top questions about Buffalo Jalapeño Poppers
1. How do I choose the right jalapeños?
Use fresh, firm jalapeños with smooth skins for the best heat and flavor. Softer peppers might be milder or bitter.
2. How spicy will these poppers be?
Adjust the buffalo sauce amount based on your spice tolerance. Start small, taste, then add more if needed.
3. How do I know when they’re done?
Bake until the cheese is bubbly and golden around the edges, about 15-20 minutes at 200°C (390°F). The peppers should be soft with blistered skins.
4. Can I make these ahead of time?
If you want extra crunch, broil the poppers for 1-2 minutes, but keep a close eye to prevent burning.
5. How long can I store leftovers?
Yes, you can stuff the peppers a day in advance, keep them covered in the fridge, then bake before serving.
6. Can I make these dairy-free?
Swap cream cheese for coconut or cashew-based cheese for a dairy-free version; expect a slightly different texture but still creamy.
7. What cheese can I substitute?
Use shredded Monterey Jack or Pepper Jack instead of cheddar for different melt qualities and spice levels.
8. How do I handle the peppers safely?
Handle peppers with gloves or a paper towel to avoid capsaicin irritation. Be careful when removing seeds for milder heat.
9. What if the cheese overflows or burns?
If cheese overflows or gets burnt, cover with foil or reduce baking time slightly. For uneven cooking, rotate the tray.
10. How do I fill the peppers neatly?
Use a small spoon or piping bag for neat stuffing. Pre-softened cheese mixes spread more smoothly and evenly.
These Buffalo Jalapeño Poppers are a reminder that simple ingredients, when balanced well, can create something truly satisfying. Their fiery kick and creamy interior make them a perfect snack for sharing or just keeping to yourself during a quiet moment. Honestly, they’ve become a go-to for me when I want something spicy and cheesy without fuss.
In a world full of quick bites and takeout, making these at home reconnects me with real flavors and the joy of proper crispy, cheesy bites. Plus, there’s a little thrill in getting that perfect blister on the peppers and watching the cheese bubble to golden perfection. They’re messy, honest, and totally worth the effort.

Hi, I’m Katie Dawson, the owner, cook, and storyteller behind Little More Lovely. I run a small café in a cozy corner of Seattle, where the smell of freshly baked bread meets the hum of neighborhood chatter. I’ve spent years learning how food can bring people together, both as a professional and as someone who loves to share meals with family and friends.

