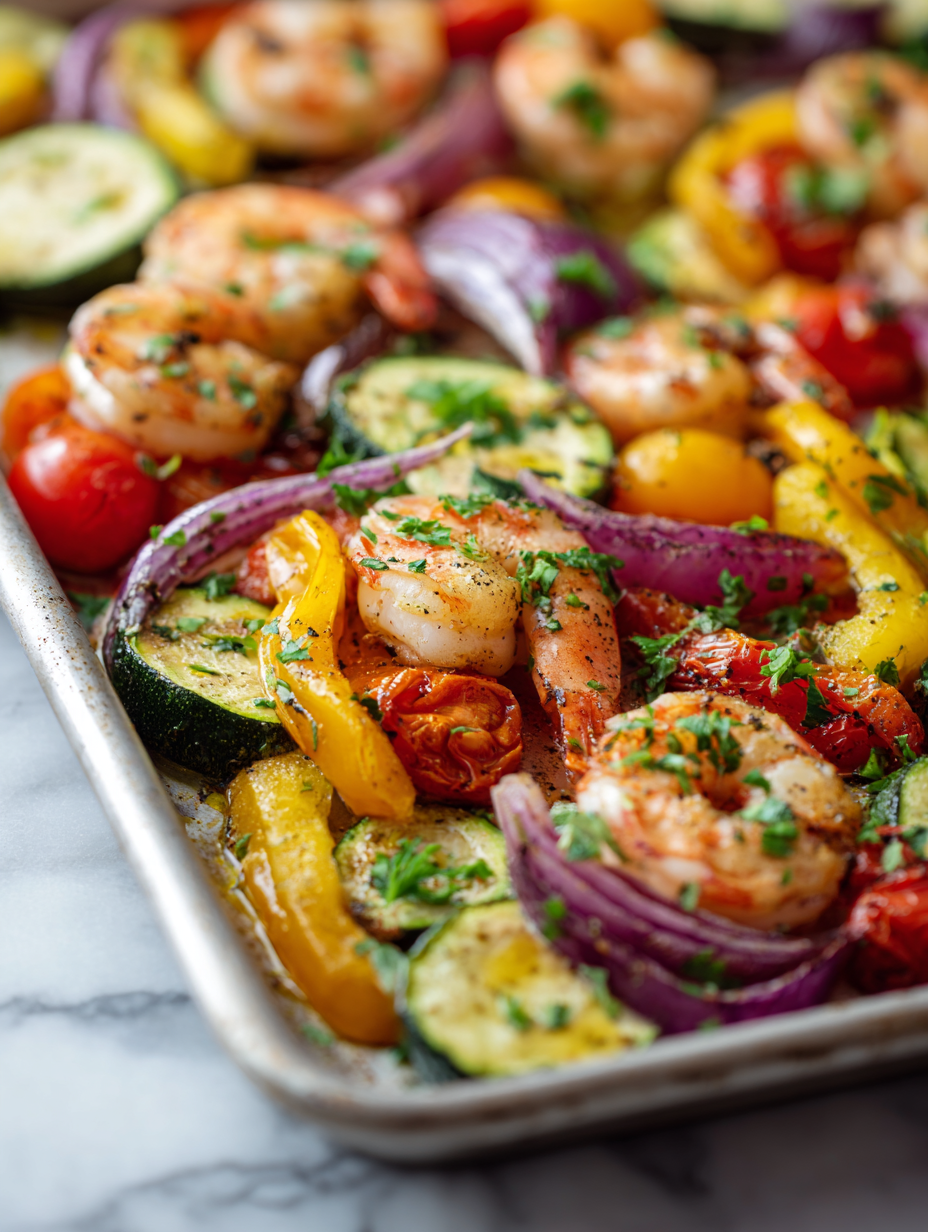
This sheet pan shrimp and vegetables recipe is all about those crispy, caramelized edges that develop when you give everything enough heat and a little time. I love how the shrimp get that smoky, slightly charred crust, almost like they’ve been grilled, even though they’re baked. It’s a small detail that turns a straightforward dish into something a little special, a reminder that simple ingredients can surprise you with depth.
What really makes this dish work is the blistered, tender vegetables that soak up all those smoky, roasted flavors. No fuss, no extra pans—just toss everything on a sheet tray, pop it in the oven, and you’re left with a meal that’s bold in flavor and satisfying in texture. It’s perfect for busy weeknights when you want something quick but still crave that layered, roasted feel.
Plus, I find that the caramelization releases a faint, irresistible aroma—think roasted garlic mingled with smoky shrimp—that makes the kitchen smell like a little party. It’s a dish that feels indulgent without fuss, and the chance to get those perfect charred spots always feels a little like a small victory in the kitchen.
Focusing on how the caramelized edges of the shrimp and blistered vegetables bring a smoky depth that transforms a simple sheet pan dinner into a rich, almost roasted experience.
The magic of caramelized edges
- I love how the shrimp turn tender yet slightly crisp at the edges, almost like they’ve been grilled.
- There’s a quiet thrill in seeing those blistered, caramelized vegetables after roasting—like little bursts of smoky sweetness.
- This dish reminds me of summer nights when I’d grill everything outside, but it’s so much easier to toss it all on a sheet pan and forget about it.
- The aroma of roasted garlic and charred veggies filling the kitchen makes me feel at home, like a cozy, effortless dinner is happening.
- I get a small sense of pride knowing everything cooks together, perfect timing, no fuss, and no extra dishes to wash.
The story behind this recipe
- This dish was born out of a busy weeknight craving for something flavorful but quick. I needed a way to make the most of those last vegetables in the fridge and some shrimp that had been sitting a little too long. The idea to roast everything together on a single sheet pan came naturally—less mess, more flavor. Over time, I’ve tweaked the seasoning and timing to get that perfect balance of smoky edges and tender bites.
- What keeps drawing me back to this recipe is how it feels like a little celebration of simple ingredients turned bold through heat and patience. I remember the first time I managed to get the shrimp just right—lightly crispy, juicy inside, with a hint of char. It’s those small wins, the caramelized bits, the smoky aroma, that make this dish stick around in my weekly rotation.
- heading
- story_type
Historical tidbits about sheet pan meals
- This dish has roots in one-pan meals popular in busy kitchens of the 1950s, emphasizing simplicity and speed.
- The concept of roasting shrimp and vegetables together likely evolved from Mediterranean roasting techniques that enhance natural flavors.
- In recent years, sheet pan dinners have surged in popularity with home cooks seeking quick, flavorful solutions without dirtying multiple pots.
Ingredient breakdown: key components
- Shrimp: I prefer wild, large shrimp for their sweet, briny flavor; their firm texture holds up well to roasting—look for those with firm, translucent flesh, and peel them yourself for maximum juiciness.
- Bell Peppers: I love using a mix of red and yellow for color and sweetness; roasting brings out a smoky, caramelized note—skip the green if you want less bitterness, and look for peppers with tight, shiny skin.
- Zucchini: Their mild, slightly grassy flavor becomes tender and juicy when roasted; I slice them thick enough to avoid sogginess—if they get too soft, reduce oven time next round.
- Red Onion: Their sweet pungency mellows and intensifies with roasting—cut into thick wedges, and watch for that caramelized glow; if they burn, cover the pan slightly or reduce heat.
- Olive Oil: I use a good extra-virgin for that fruity, peppery kick—drizzle generously to encourage blistering and browning; for a lighter touch, cut back slightly but expect less crispness.
- Garlic: Minced fresh garlic adds a punch of aroma—be cautious not to burn it, as it turns bitter fast; add toward the end if roasting at high heat, or use garlic powder for ease.
- Lemon Juice: Brightens everything with a zing—preferably freshly squeezed, to cut through the richness of shrimp and roasted veggies; a squeeze just before serving keeps it vibrant and fresh.
Spotlight on key ingredients
Shrimp:
- I prefer wild, large shrimp for their sweet, briny flavor; their firm texture holds up well to roasting—look for those with firm, translucent flesh, and peel them yourself for maximum juiciness.
- Bell Peppers: I love using a mix of red and yellow for color and sweetness; roasting brings out a smoky, caramelized note—skip the green if you want less bitterness, and look for peppers with tight, shiny skin.
Vegetables (Zucchini & Red Onion):
- Zucchini: Their mild, slightly grassy flavor becomes tender and juicy when roasted; I slice them thick enough to avoid sogginess—if they get too soft, reduce oven time next round.
- Red Onion: Their sweet pungency mellows and intensifies with roasting—cut into thick wedges, and watch for that caramelized glow; if they burn, cover the pan slightly or reduce heat.
Notes for ingredient swaps
- Dairy-Free: Use coconut oil instead of olive oil for a subtle coconut aroma and richer mouthfeel.
- Spicy Kick: Swap in red pepper flakes or a dash of hot sauce to add heat, balancing sweet peppers and shrimp.
- Vegetarian: Replace shrimp with tofu or tempeh, marinated beforehand, for a similar texture and protein boost.
- Low-Sodium: Use reduced-salt seasonings and skip added salt to keep it light, especially if using salty ingredients like olives.
- Herb Variations: Fresh thyme or oregano can replace parsley for a more Mediterranean flavor profile, adding herbal depth.
- Citrus Swap: Lime juice can replace lemon for a slightly different brightness and a more tropical note.
- Root Vegetables: Carrots or sweet potatoes can be roasted instead of zucchini, adding sweetness and a hearty texture.
Equipment & Tools
- Large rimmed baking sheet: Provides space for even roasting of all ingredients.
- Mixing bowl: Toss and coat vegetables and shrimp evenly with oil and seasonings.
- Small bowl: Hold garlic, herbs, or seasoning blends for even distribution.
Step-by-step guide to roasting
- Gather your equipment: a large rimmed baking sheet, a mixing bowl, and a small bowl for garlic and seasoning. Preheat your oven to 220°C (425°F).
- Prep the vegetables: wash and cut bell peppers, zucchini, and red onion into roughly equal-sized chunks—about 2 inches each. Toss them in a bowl with 2 tbsp olive oil, salt, and pepper.
- Prepare the shrimp: peel and devein if necessary. Pat dry thoroughly—moisture is the enemy of caramelization. Toss with 1 tbsp olive oil, a pinch of salt, pepper, and a squeeze of lemon juice.
- Arrange everything: spread the vegetables evenly on the sheet pan. Place the shrimp on top, making sure they’re not overcrowded. Drizzle with remaining olive oil and sprinkle garlic evenly over all.
- Roast in the oven: cook for 8-10 minutes, until vegetables blister and shrimp turn pink. Halfway through, stir vegetables for even charring. Keep an ear out for that crackling sound of browning edges.
- Check for doneness: vegetables should be golden and blistered, shrimp firm and slightly crisp at the edges, with a smoky aroma filling the air. If not, roast for another 2 minutes.
- Finish and serve: squeeze fresh lemon over everything, garnish with chopped herbs if desired. Rest for 2 minutes, then plate directly from the sheet pan, allowing juices to mingle.
- Final check: shrimp should be opaque and firm, vegetables tender with caramelized spots, and the smell should be sweetly smoky. If still raw, give it another minute or two.
Allow the dish to rest for 2 minutes to let juices settle. Serve straight from the sheet pan, garnished with fresh herbs or extra lemon if desired. The residual heat keeps everything warm and enhances flavors.
How to Know It’s Done
- Shrimp are opaque and pink with a slight crisp at the edges.
- Vegetables are blistered and golden with charred bits.
- A smoky aroma wafts up, indicating proper caramelization.
Sheet Pan Shrimp and Roasted Vegetables
Ingredients
Equipment
Method
- Preheat your oven to 220°C (425°F). In a large mixing bowl, toss the chopped bell peppers, zucchini, and red onion with 2 tablespoons of olive oil, salt, and pepper until evenly coated. Spread the vegetables in a single layer on the rimmed baking sheet.
- Pat the shrimp dry thoroughly with a paper towel to remove excess moisture, which helps achieve crispy edges. In another bowl, toss the shrimp with 1 tablespoon of olive oil, a pinch of salt and pepper, and a squeeze of lemon juice.
- Create space on the baking sheet by spreading the vegetables evenly. Place the seasoned shrimp on top of the vegetables, making sure they are not overcrowded for even roasting. Sprinkle the minced garlic evenly over all ingredients.
- Insert the sheet pan into the oven and roast for about 8-10 minutes. During roasting, listen for a gentle crackling sound indicating caramelization, and watch for blistered, golden edges on the vegetables and pink, opaque shrimp.
- About halfway through, gently stir the vegetables to promote even blistering and flavor development, being careful not to disturb the shrimp too much.
- Once the shrimp turn pink and slightly crisp at the edges, and the vegetables are blistered and caramelized, remove the sheet pan from the oven. Squeeze fresh lemon juice over everything to brighten the flavors.
- Let the dish rest for 2 minutes so the juices settle. Then, serve directly from the sheet pan, garnished with fresh herbs if desired, and enjoy the smoky, caramelized flavors with tender shrimp and blistered vegetables.
Pro tips for perfect sheet pan shrimp
- Use high heat—your oven’s max setting—so veggies blister and shrimp develop a smoky crust.
- Spread ingredients in a single layer—crowding causes steaming, not roasting, and hampers caramelization.
- Toss shrimp with oil and lemon before roasting—this ensures juicy bites with a slight glaze.
- Add garlic midway—burnt garlic turns bitter fast, so introduce it when the edges of veggies start to brown.
- Shake the pan gently halfway through—redistributes heat and promotes even charring without overcooking.
- Rest the dish 2 minutes after roasting—juice redistributes, flavors deepen, and everything stays tender.
- Finish with a squeeze of lemon—brightens smoky, caramelized flavors and adds a fresh pop.
Common mistakes and how to fix them
- FORGOT to pat shrimp dry → Leaves them soggy, dry thoroughly for crispy edges.
- DUMPED all vegetables together → Spread vegetables evenly to prevent steaming, ensure blistering.
- OVER-TORCHED the garlic → Add garlic later or reduce heat to avoid bitter, burnt bits.
- SKIPPED resting time → Rest dish 2 minutes to let juices settle, enhances flavor and texture.
Quick fixes and pantry swaps
- When shrimp turn rubbery → Splash with lemon juice and cook 1 minute less next time.
- If vegetables burn quickly → Dump in a little water or cover with foil halfway through roasting.
- When edges aren’t blistered enough → Increase oven temp by 10°C (20°F) and extend roasting time.
- Splash oil if ingredients stick → Patch with a quick drizzle of oil and stir gently to prevent burning.
- When you forget to pat shrimp dry → Rescue with a paper towel, then broil for 1 minute to crisp edges.
Prep, store, and reheat tips
- Prep the vegetables: wash, peel, and cut them into even chunks the night before; store in an airtight container for crispness.
- Shell and devein the shrimp ahead of time; keep them refrigerated for up to 24 hours, pat dry before roasting for optimal caramelization.
- Assemble the seasoning mixture and measure out oil and lemon juice in advance; keep in small containers to streamline assembly.
- Refrigerate leftovers in an airtight container for up to 2 days; the flavors deepen slightly, and the edges may lose some crispness.
- Reheat gently in the oven at 180°C (350°F) for 5-7 minutes until warmed through; expect the edges to regain a hint of crunch and aroma.
Top questions about sheet pan shrimp
1. Can I use frozen shrimp?
Use large, raw shrimp with shells removed; they develop a smoky, juicy flavor when roasted. Peel them yourself for best texture.
2. Should I thaw the shrimp before roasting?
Yes, but thaw and thoroughly dry them first. Excess moisture prevents crispy edges and can cause steaming.
3. How do I keep vegetables from getting soggy?
Cut vegetables into similar-sized pieces, about 2 inches. This ensures even cooking and caramelization without sogginess.
4. How long should I roast everything?
Roast at 220°C (425°F) for about 8-10 minutes. Look for blistered edges on veggies and pink, opaque shrimp.
5. Can I use a different oil?
Use a good quality olive oil with fruity notes. It helps promote browning and adds flavor; drizzle generously before roasting.
6. When should I add garlic?
Add garlic in the last 2 minutes of roasting to prevent bitterness and burning. It should be fragrant and slightly golden.
7. Should I add lemon before or after roasting?
Finish with a squeeze of fresh lemon juice to brighten the smoky, caramelized flavors and add a fresh zing.
8. How do I store leftovers?
Leftovers keep well in the fridge for up to 2 days. Reheat in a 180°C (350°F) oven until warmed and edges crisp again.
9. Can I add heat to this dish?
For extra spice, sprinkle red pepper flakes or hot sauce before roasting. It adds a warm, fiery kick to balance the sweetness.
10. What if my dish isn’t crispy enough?
If vegetables aren’t blistering, increase oven temp slightly or extend roasting time by 2 minutes, watch for smoky edges and tender shrimp.
This dish isn’t just about quick cleanup—it’s about capturing that smoky, caramelized magic in a single tray. The contrast between tender shrimp and blistered vegetables makes every bite feel both simple and indulgent. It’s a reminder that sometimes, less really is more, especially when you lean into those bold, roasted flavors.
When you’re craving comfort but short on time, this recipe delivers with honest, honest-to-goodness flavor. Plus, it’s flexible enough to tweak with your favorite herbs or a splash of spice. No fuss, no extra dishes—just a straightforward way to enjoy a lively, satisfying meal.

Hi, I’m Katie Dawson, the owner, cook, and storyteller behind Little More Lovely. I run a small café in a cozy corner of Seattle, where the smell of freshly baked bread meets the hum of neighborhood chatter. I’ve spent years learning how food can bring people together, both as a professional and as someone who loves to share meals with family and friends.

